
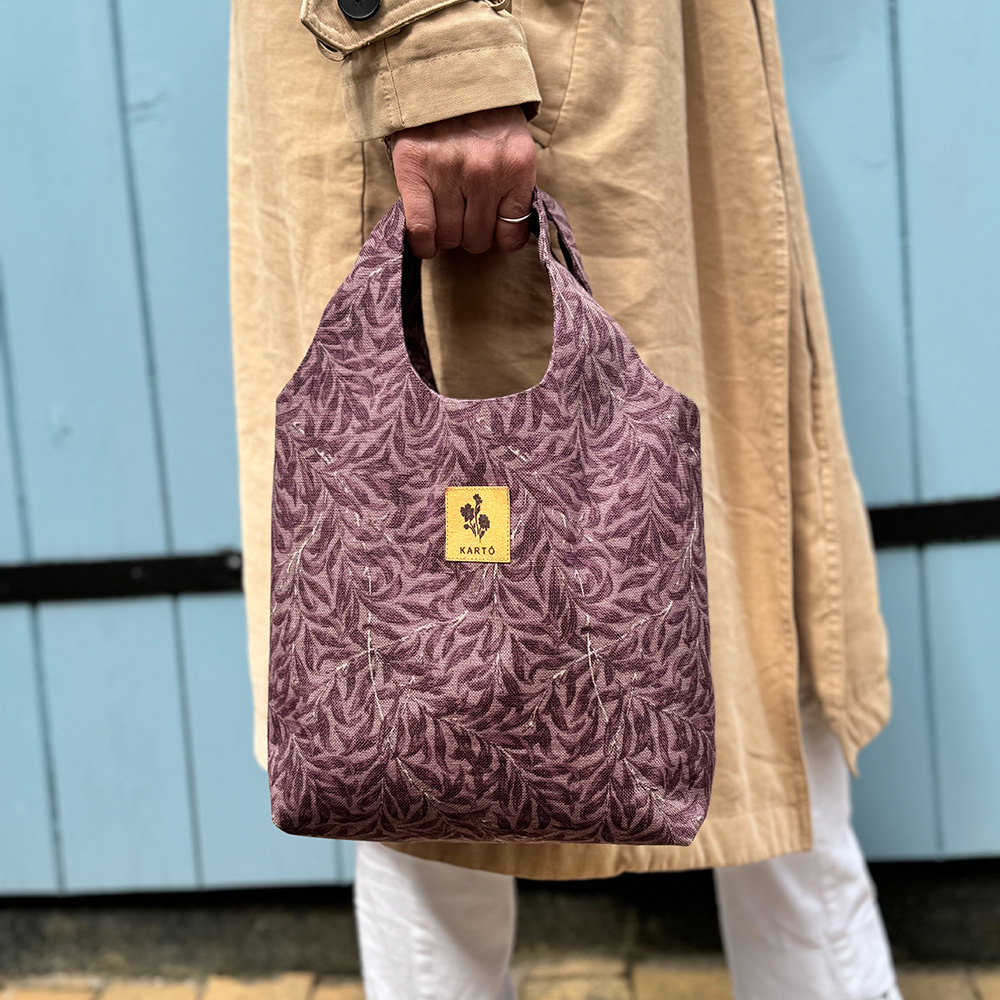
AGNES – MODERN, ELEGANT AND FUNCTIONAL...
Agnes is a stylish and practical shoulder bag that can be sewn in a variety of fabrics. Use canvas, linen, corduroy, denim or cotton – and choose the look that suits your personal style.
The bag is fully lined and features a large inner pocket.
Access to Your Video Sewing Tutorial
You need a password to access your video sewing tutorial.
Your password is on the pattern and is unique to you.
If you need assistance, feel free to contact us at sewing@karto.dk.
1A. Supplies for the bag - Agnes Tote bag

Supplies - Agnes Tote bag
1 metre fabric for the outer bag
0.5 metre fabric for the lining and pocket
1 button
16 cm cord
23 cm interfacing tape with stabilising threads
1B. Supplies for the bag - Petit Agnes Handbag
Supplies - Petit Agnes
0.55 metre of fabric for the outer bag
0.3 metre of fabric for the lining and pocket
1 button
13 cm cord
50 cm Vlieseline H250
20 cm interfacing tape with stabilising threads
2. Pattern with seam allowance

Seam allowance
Petit Agnes: The pattern includes a 1 cm seam allowance.
Agnes Tote Bag: The pattern includes a 1.5 cm seam allowance on the side seams and bottom. All other seams are sewn with a 1 cm seam allowance.
Always follow the seam allowance indicated on the pattern.
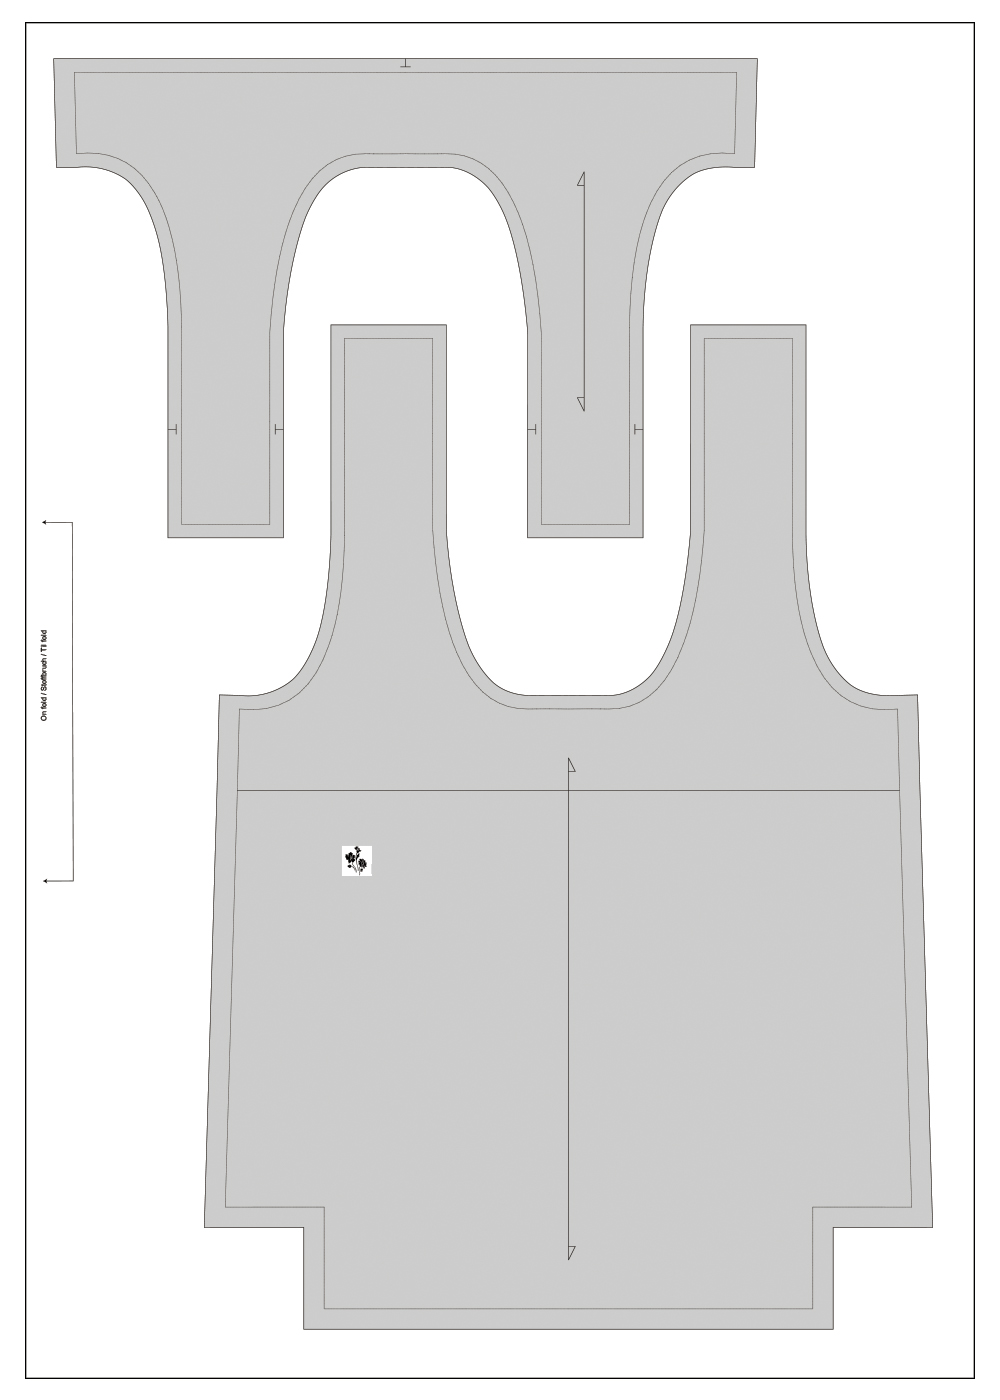
Thread direction is important
The arrow on the pattern piece should always be parallel to the fabric edge to ensure the pattern piece is placed correctly on the fabric.
Notches / Markings
Remember to cut the small notches marked on the pattern pieces. The markings help ensure the individual pattern pieces align correctly when sewing them together.
Stitch length
I use a stitch length of 2.5 (9 stitches per 2 cm) to sew the bag together.
For decorative stitching, a stitch length of 3 is recommended.
Choose the stitch length that best suits your fabric and machine.
Symbols in the Pattern
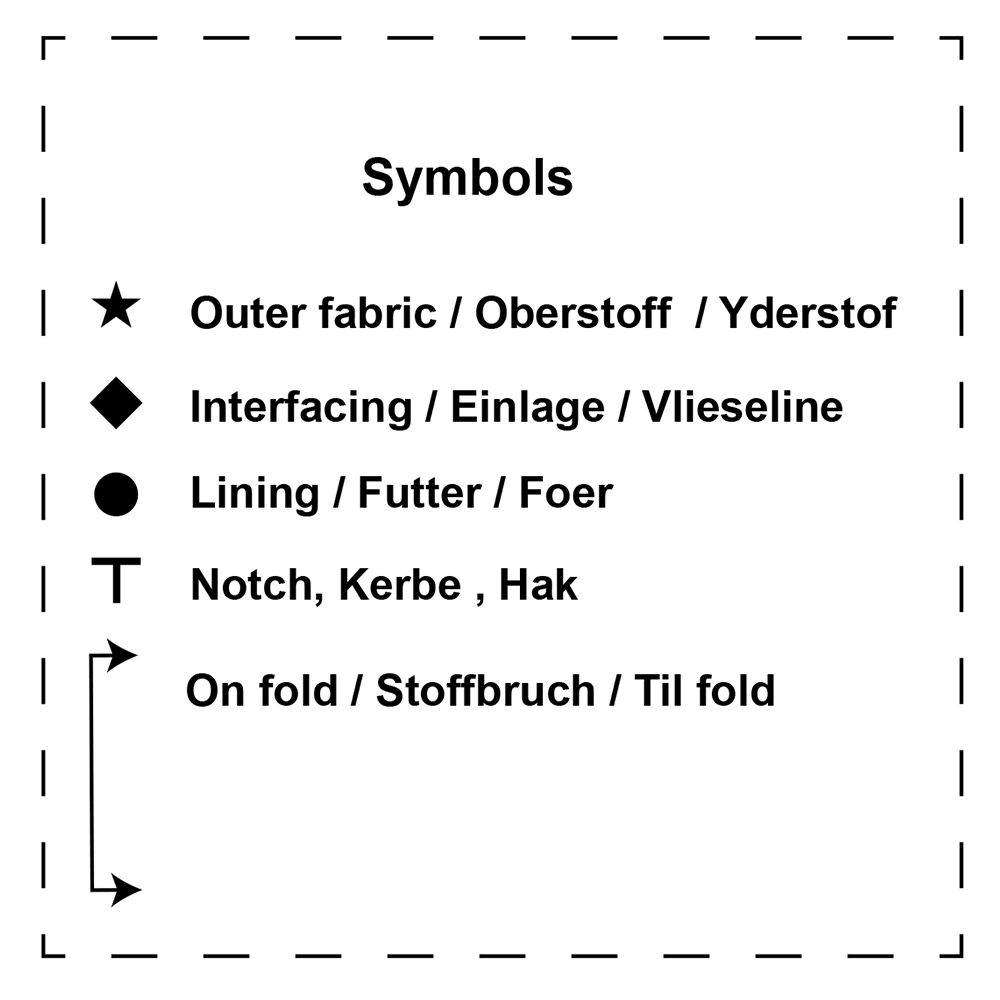
Symbols in the Pattern
This pattern uses different symbols to clearly indicate which pieces should be cut from fabric, lining, and interfacing.
There is also a symbol that marks pattern pieces to be placed on the fold of the fabric, as well as notches that help align the pieces correctly.
Follow these symbols carefully for the best results.
3. Cutting layout
Cutting layout for outer fabric
Front and back piece 2x
Facing 2x
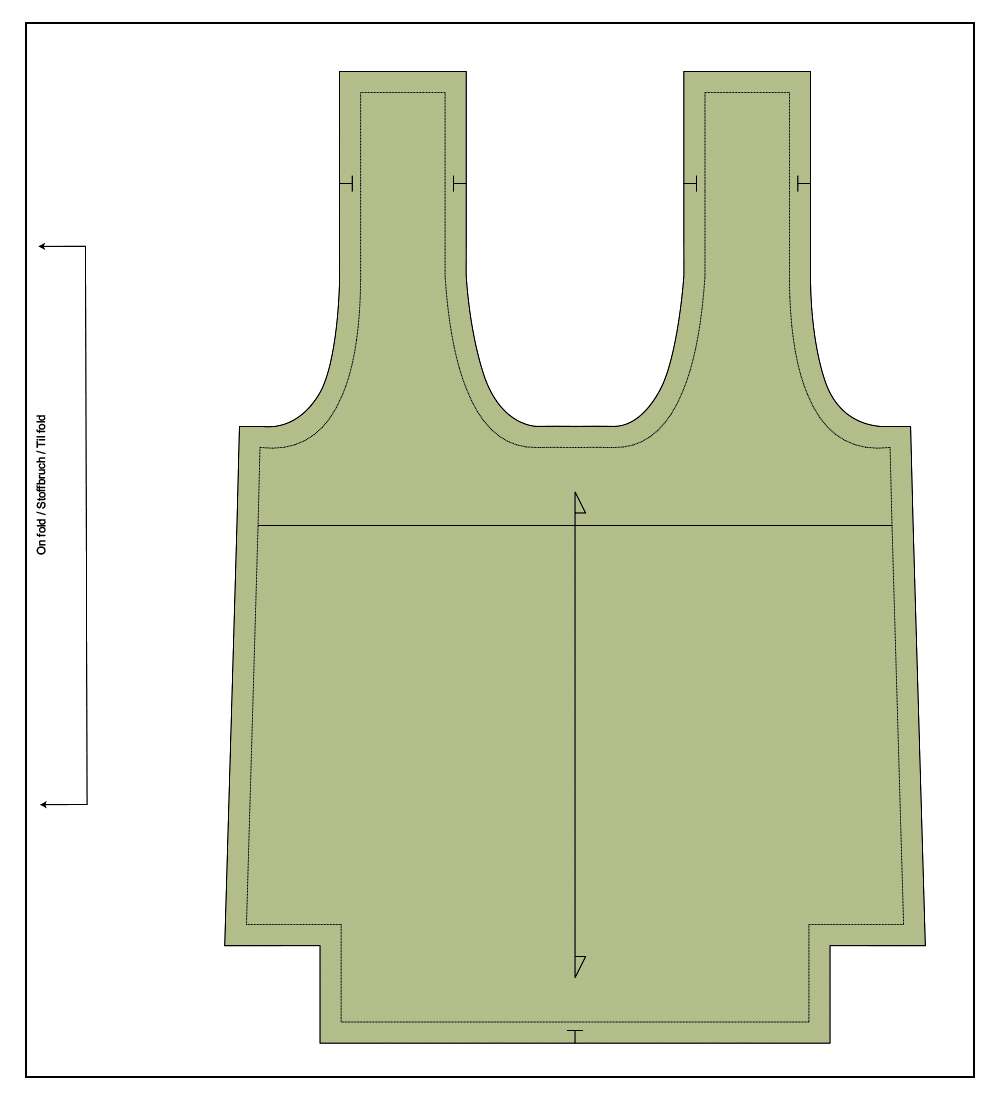
Cutting layout for lining
Front and back piece 2x
Pocket 1x

Cutting layout for interfacing
The Petit Agnes handbag can be reinforced with Vlieseline H250 for a more stable and structured look.
Fuse the interfacing before assembling the bag.
If you're using Vlieseline H250, press it on with medium heat and light pressure for about 8 seconds.
Front and back piece 2x
4. Sew the outer bag
5. Indside pocket
6. Sew the lining
7. Sew the bag together