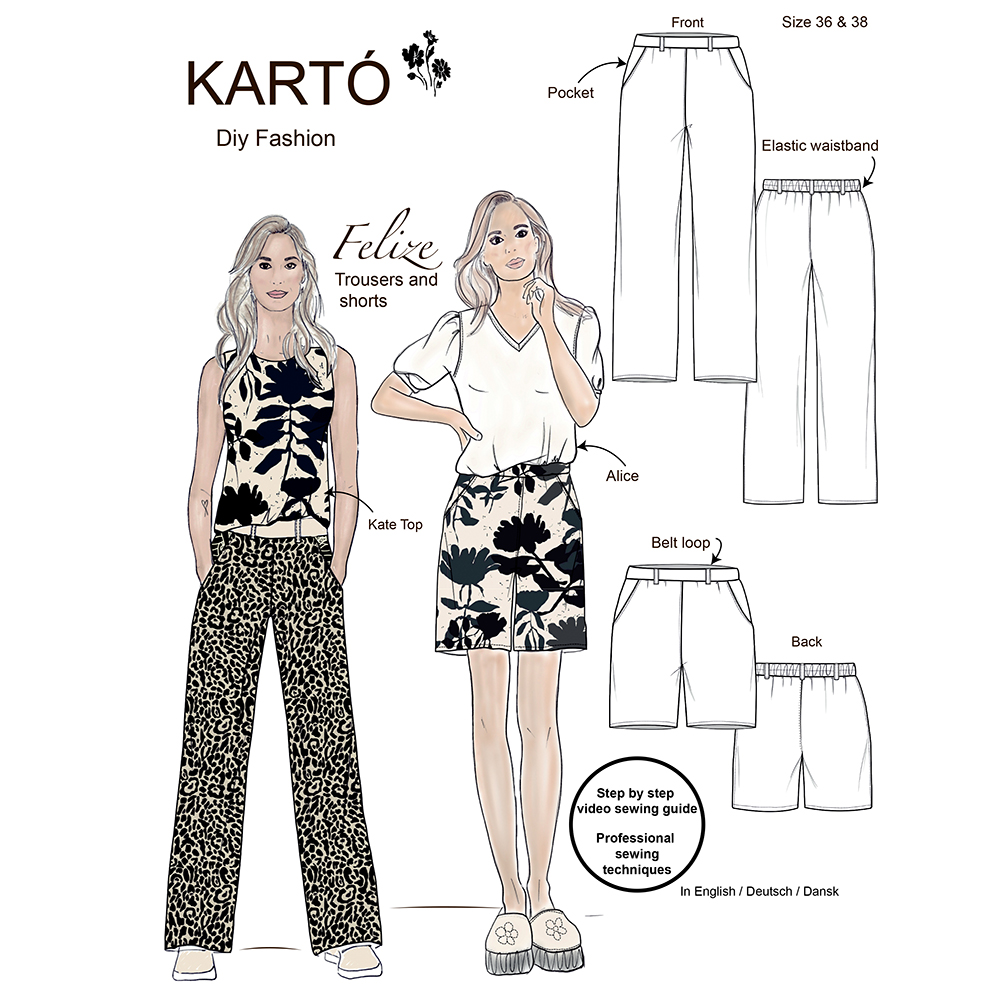
Felize – relaxed trousers with a modern silhouette
The Felize trousers combine comfort and style in the best possible way. The waistband features elastic at the back for a comfortable fit, while the front remains smooth and clean for a flattering look. You can choose to add belt loops for a more styled finish.
They have angled side pockets and a modern wide leg, giving them a relaxed yet stylish vibe. With 4–5 cm of ease at the hips, Felize offers both freedom of movement and a great silhouette.
You can also sew them as shorts, making them perfect for warmer days.
Felize works well in a range of light to medium-weight fabrics such as soft viscose, linen or cotton – depending on the look and drape you prefer.
If you have any questions in the meantime, feel free to contact us at sewing@karto.dk.
1. What you need for the trousers.
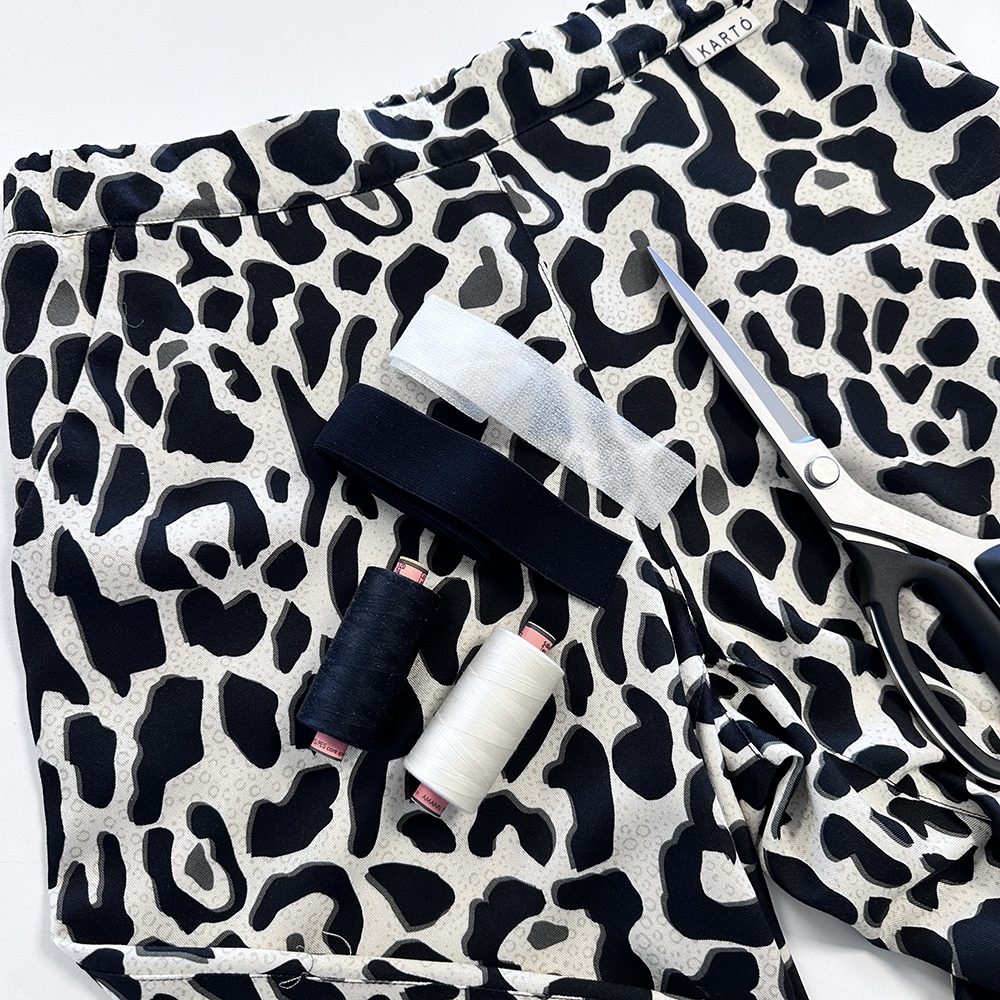
Fabric requirements.
Woven fabric, 140 cm wide.
Size 36 - 46: 2.2 meters)
Size 48 - 54: 2.5 meters)
3 cm wide elastic
1.5 meters of fusible tape, 3 cm wide.
Thread in matching colors.
How to fuse the interfacing tape:
Place the tape on the wrong side of the fabric with the adhesive side facing down. Cover with a damp cloth and press with the iron for about 12 seconds – do not slide. You can also use the steam function.
2. Pattern with seam allowance
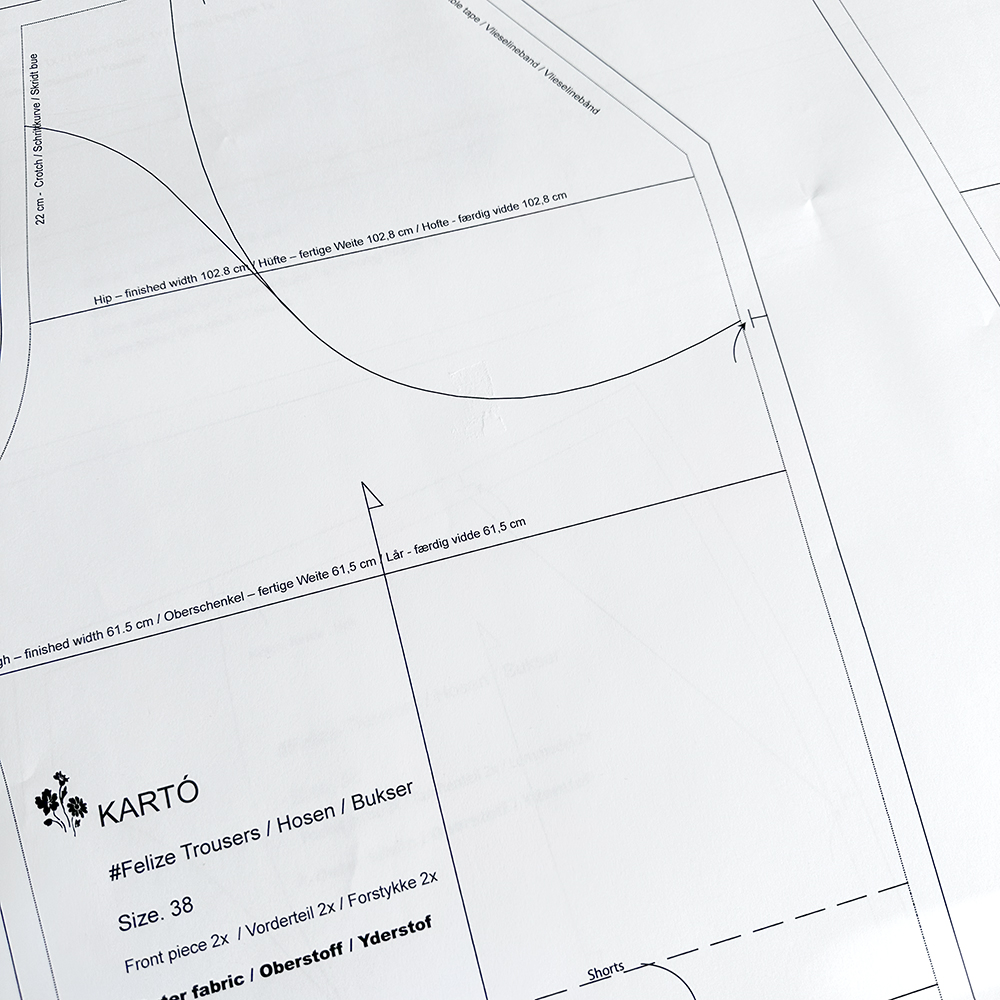
Seam allowance
Your pattern includes a 1 cm seam allowance. 3 cm seam allowance for the hem.
Thread direction is important
The arrow on the pattern piece should always be parallel to the fabric edge to ensure the pattern piece is placed correctly on the fabric.
Notches / Markings
Remember to cut the small notches marked on the pattern pieces. The markings help ensure the individual pattern pieces align correctly when sewing them together.
Stitch length
I use a stitch length of 2.5 (9 stitches per 2 cm) to sew the jacket together.
For decorative stitching, a stitch length of 3 is recommended.
Choose the stitch length that best suits your fabric and machine.
For the Felize trousers, it’s often a good idea to make the waist 5–6 cm smaller than your hip measurement.
Most fabrics have a bit of natural give, and since many of us have a softer shape around the hips, it’s usually no problem to pull the trousers on even if the waistband is slightly smaller than your body.
This results in a nice, snug fit at the waist without compromising comfort.
Symbols in the Pattern
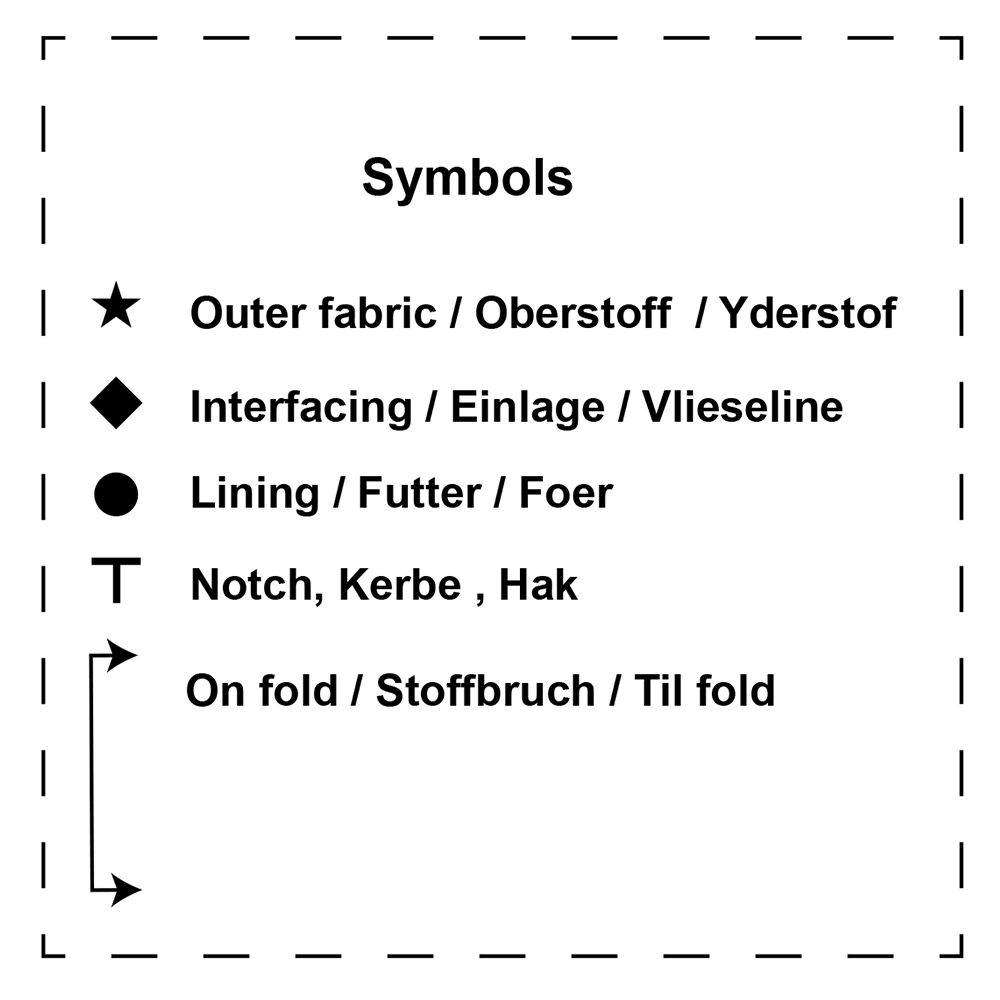
Symbols in the Pattern
This pattern uses different symbols to clearly indicate which pieces should be cut from fabric, lining, and interfacing.
There is also a symbol that marks pattern pieces to be placed on the fold of the fabric, as well as notches that help align the pieces correctly.
Follow these symbols carefully for the best results.
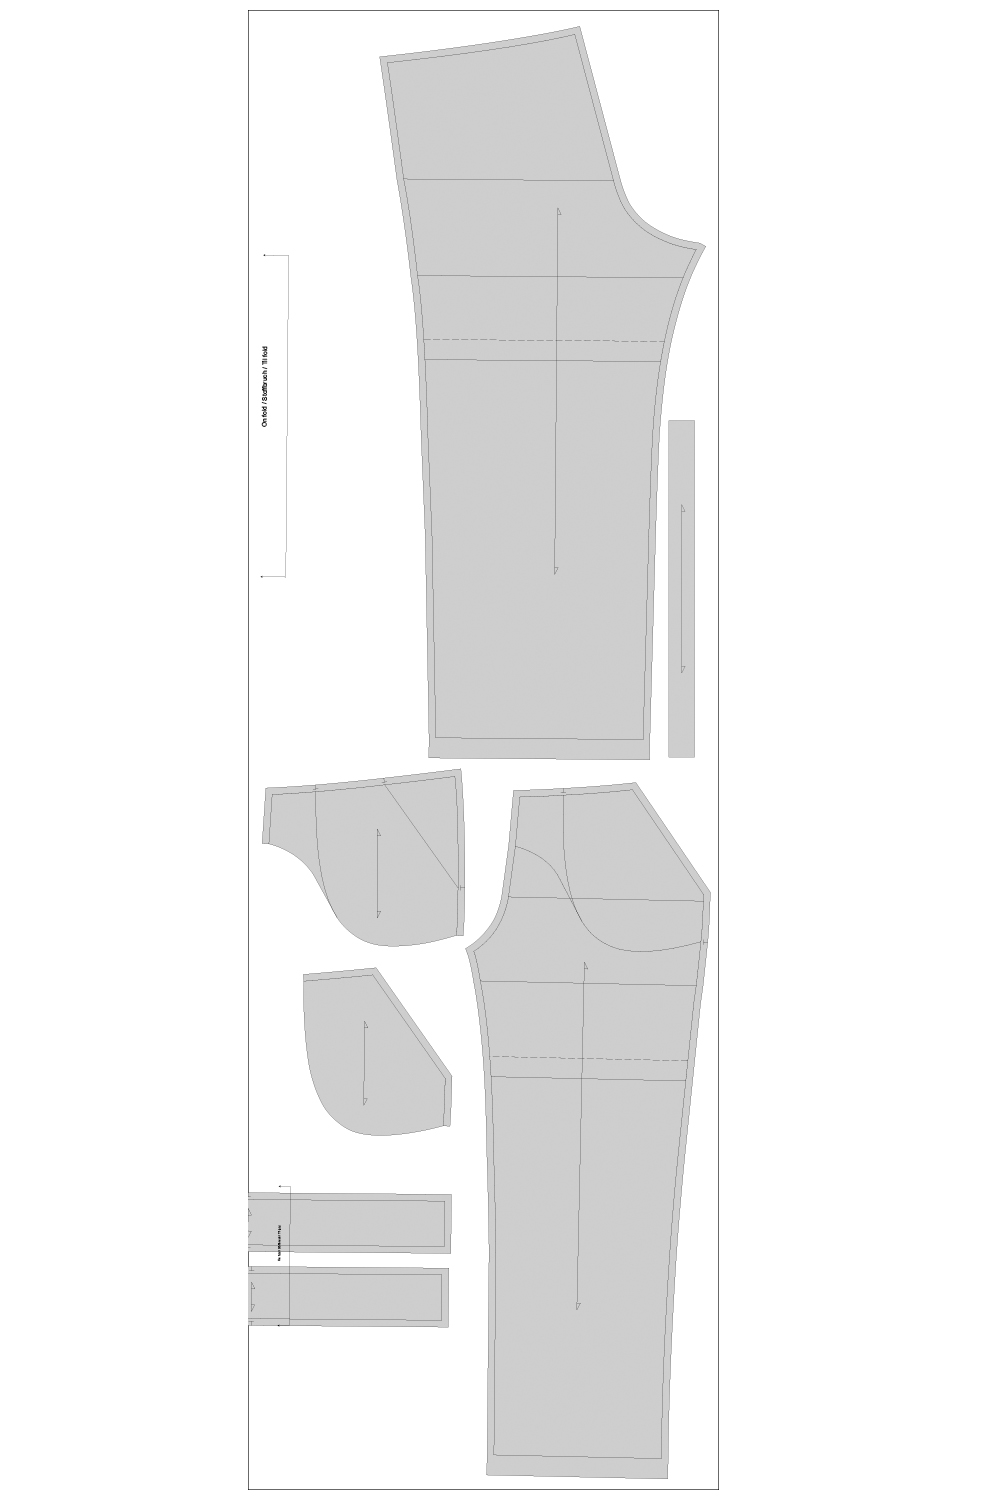
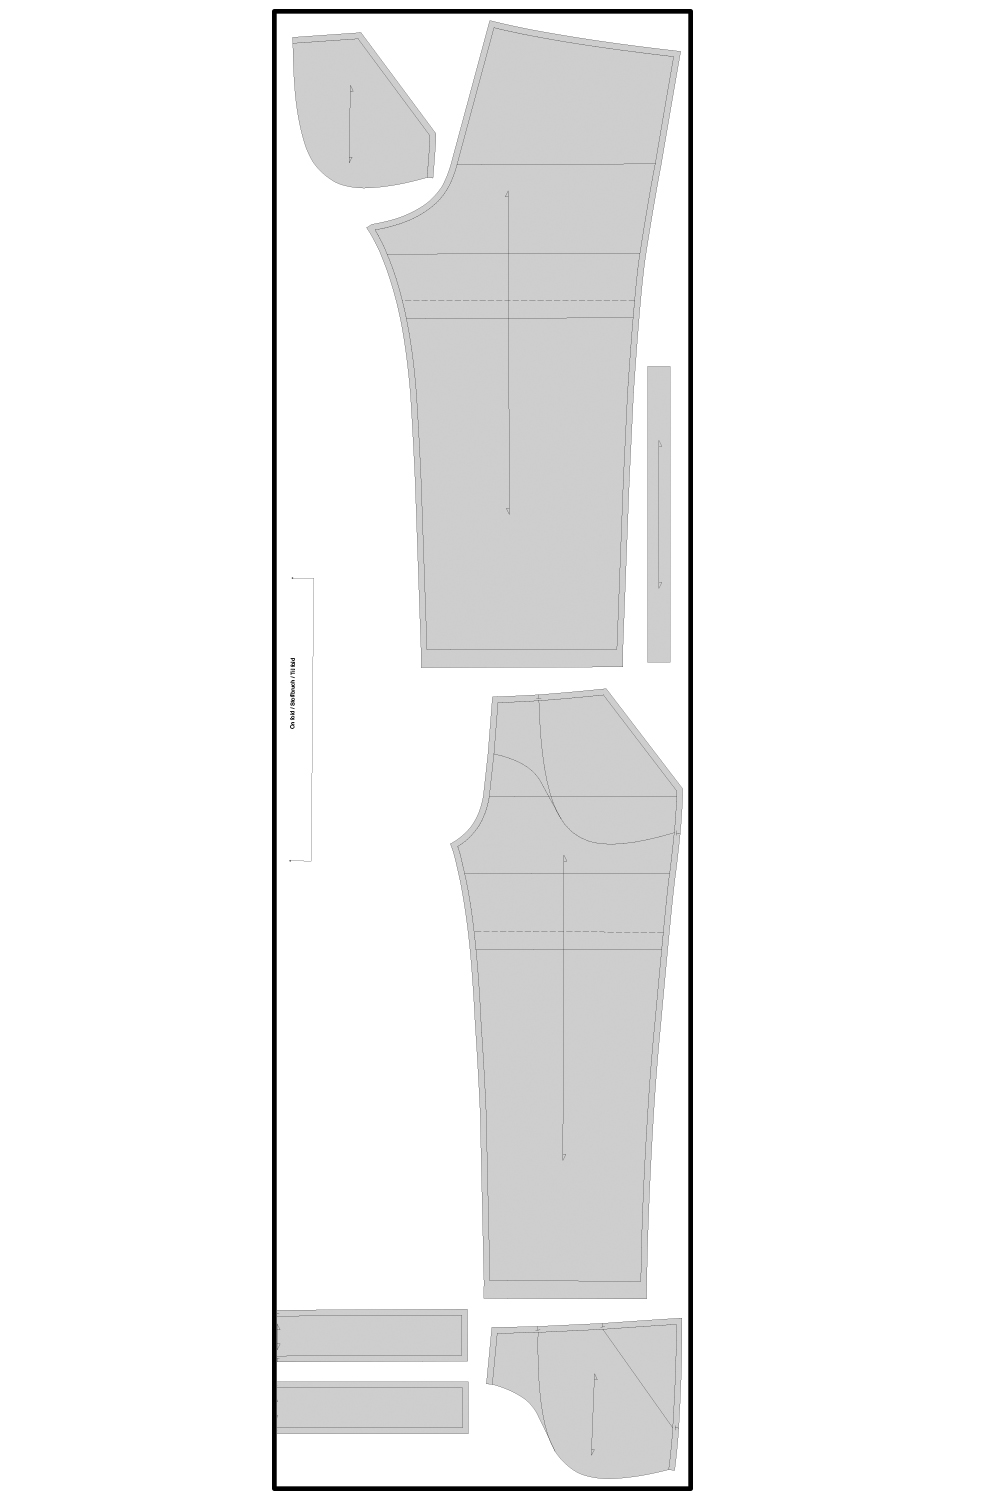
3. Cutting layout
Front piec 2x
Back piece 2x
Pocket 2x
Pocket piece 2x
Waistband front 1x
Waistband back 1x
Belt loope 1x
Size 36-46
Size 48-54
Why we use topstitching:
Topstitching serves both a practical and a visual purpose.
It holds the seam allowance in place and gives a neat, professional finish.
At the same time, it helps define the design – you can choose thread color and placement depending on the look you want. Stitch close to the edge for a subtle effect or further away for a bolder detail.
4. Sew side pockets.
5. Sew side seams.
6. Sew the crotch curve
8. Sew belt loops.
9. Sew the waistband.
10. Hemming.