
Laura – Your Next Sewing Project..
"Laura" is a versatile bag available in two beautiful sizes: an elegant handbag and a practical shoulder bag.
The bag features a clever inner pocket with two compartments.
Access to Your Video Sewing Tutorial
You need a password to access your video sewing tutorial.
Your password is on the pattern and is unique to you.
If you need assistance, feel free to contact us at sewing@karto.dk.
1. What you’ll need for the bag.
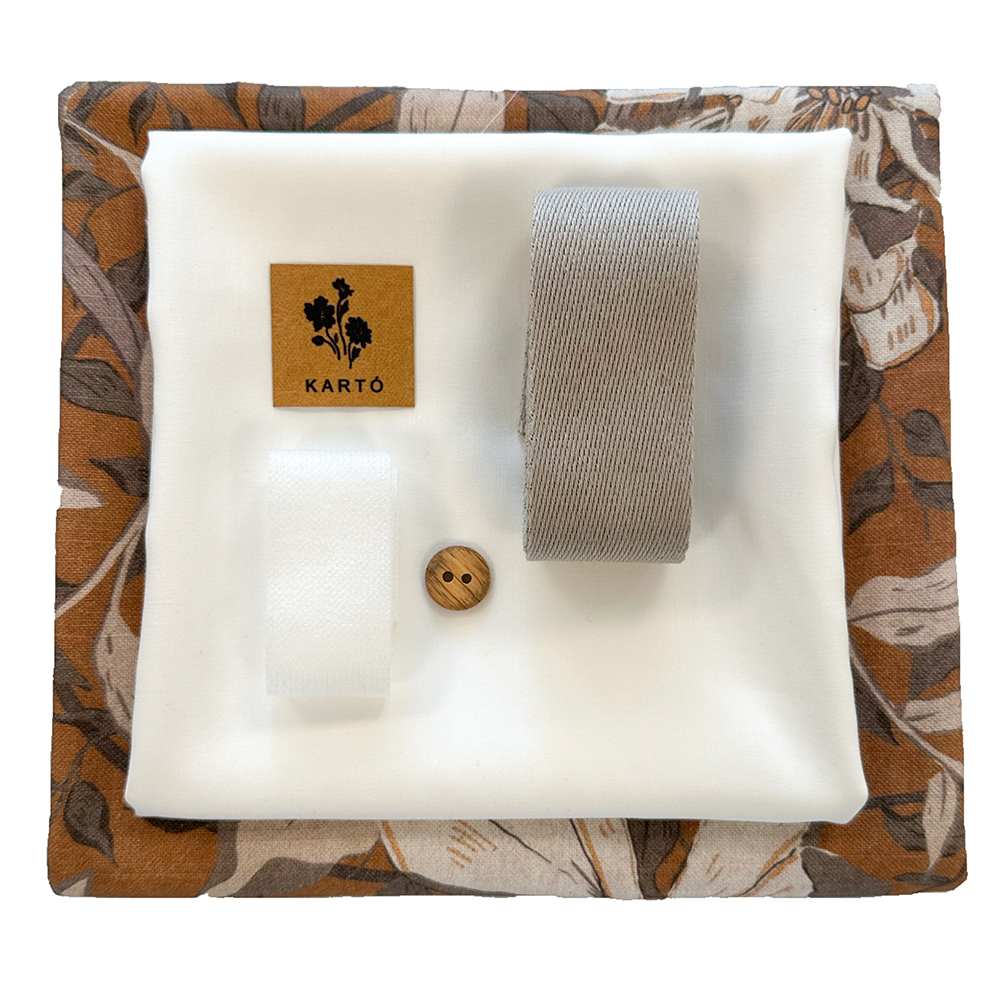
Material List
-
Outer fabric
-
Fabric for lining and pocket
-
Webbing, 4 cm wide
-
1 wooden button
-
Interfacing tape with stabilizing threads
-
1 label
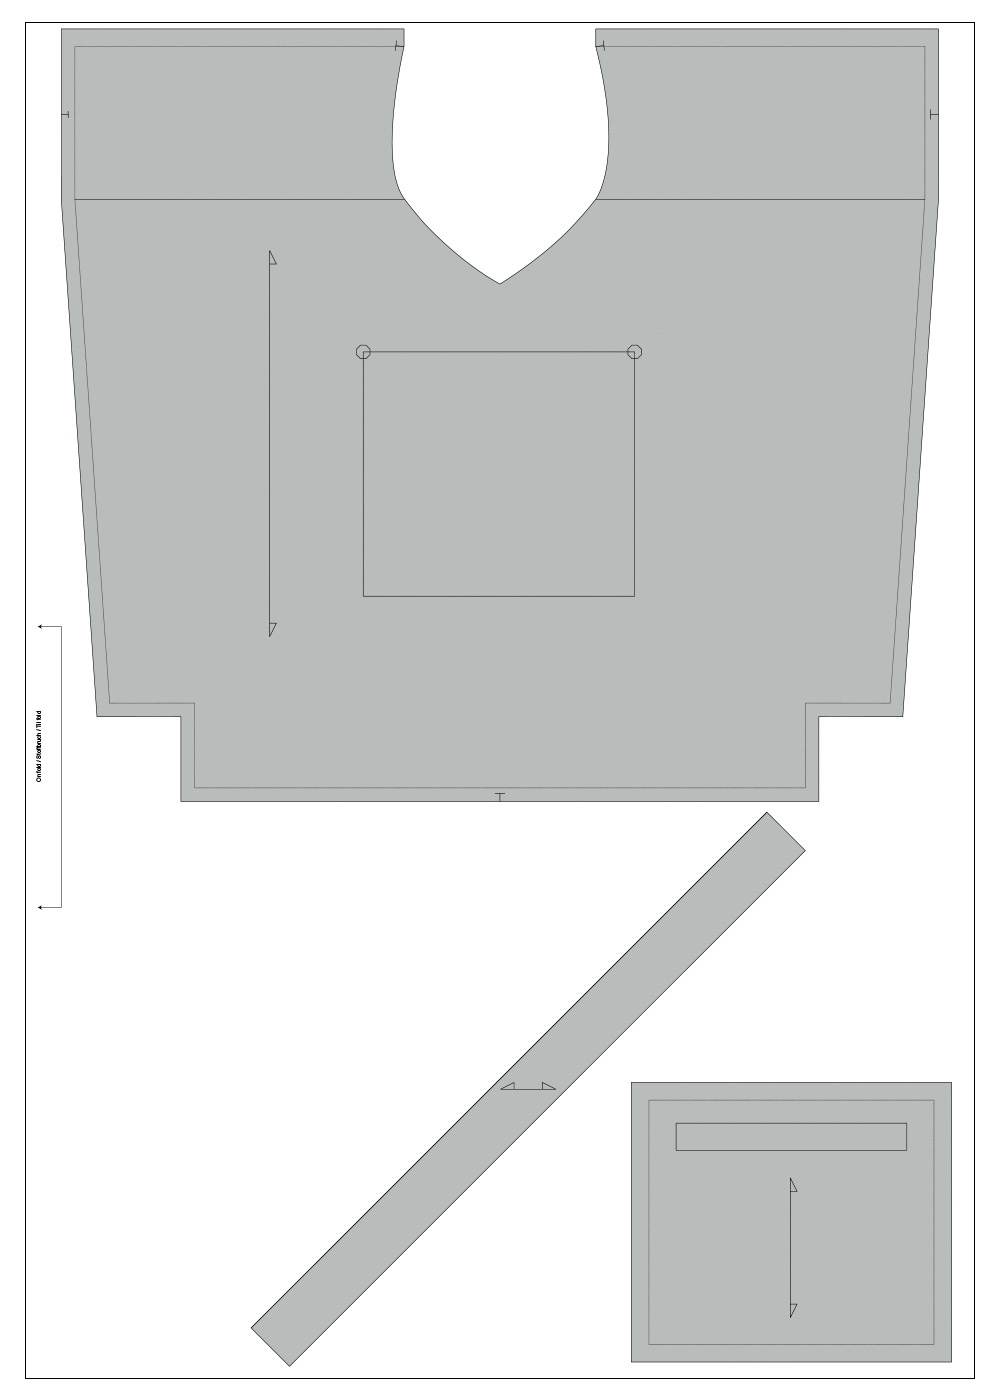
2. Pattern with seam allowance included.
Your pattern includes a 1 cm seam allowance.
Pattern pieces in outer fabric
Front/back piece – 2 pieces
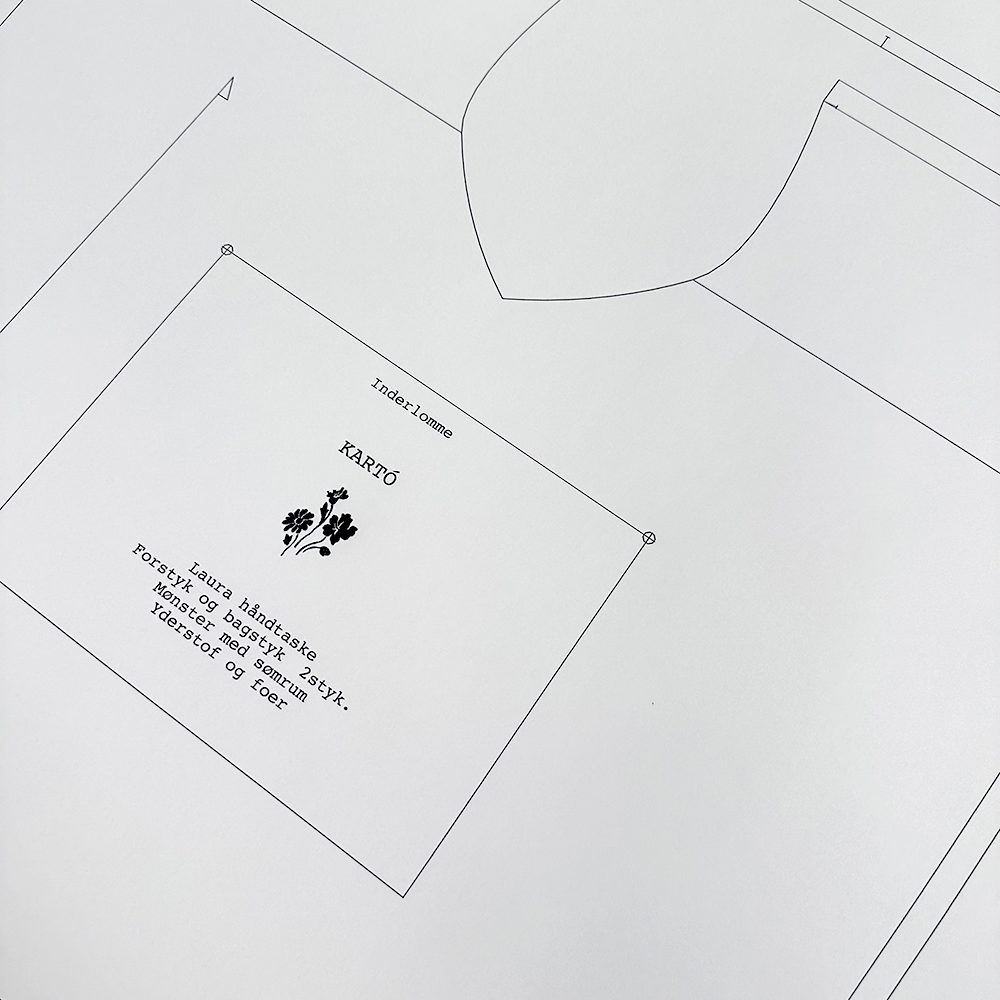
Inner pocket – 1 piece
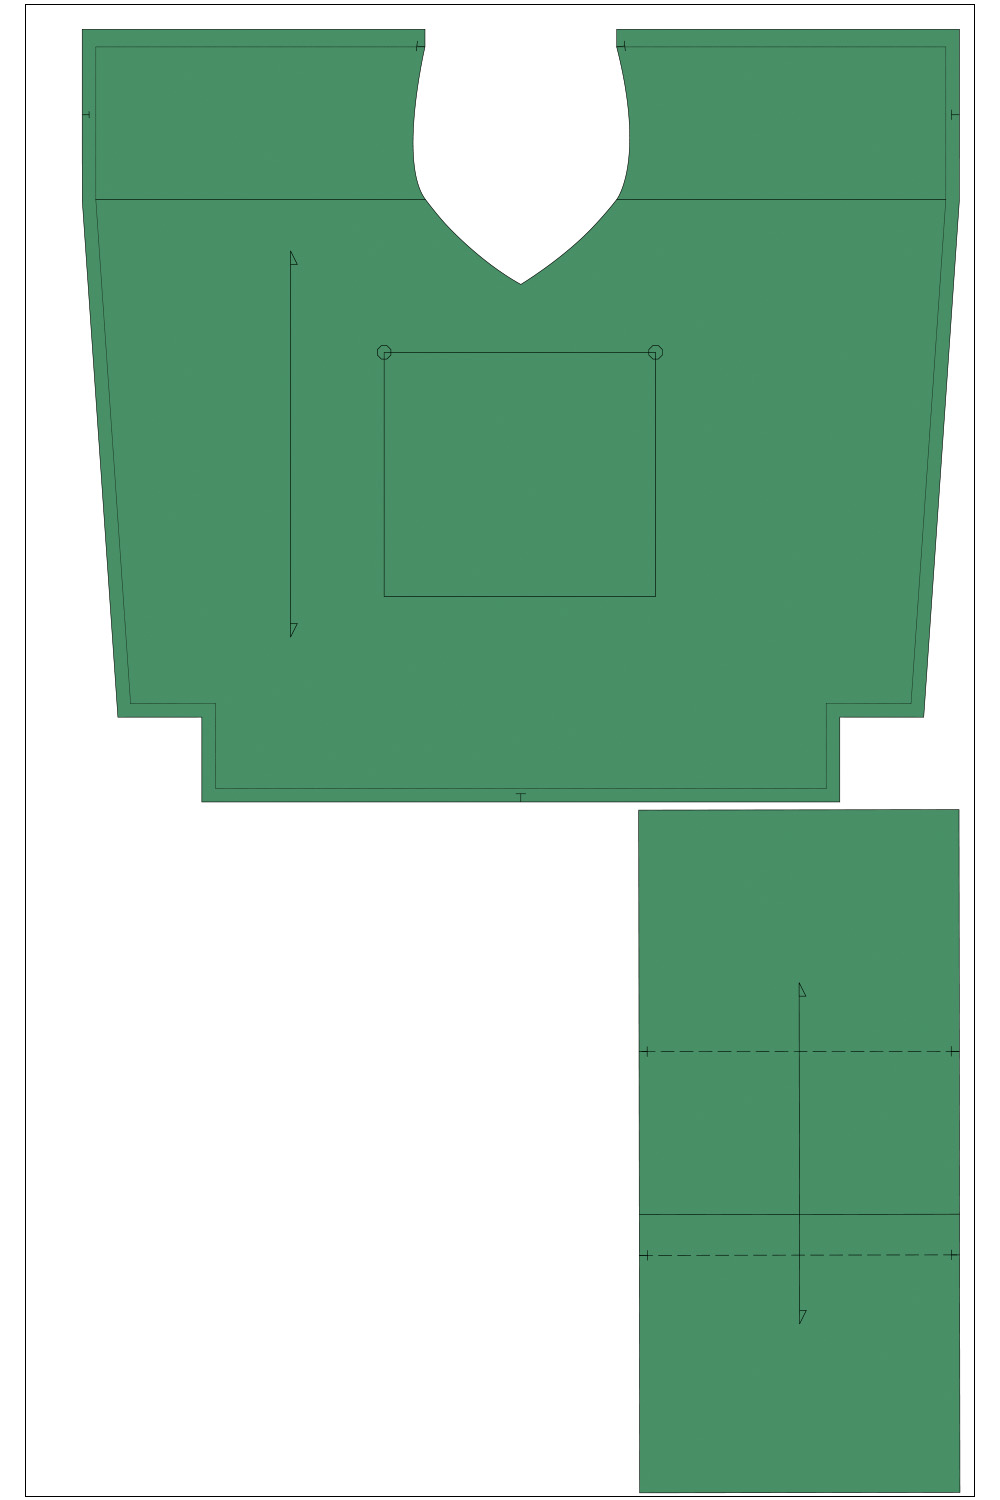
Pattern pieces for lining
Front/back piece – 2 pieces
Pocket bag – 1 piece
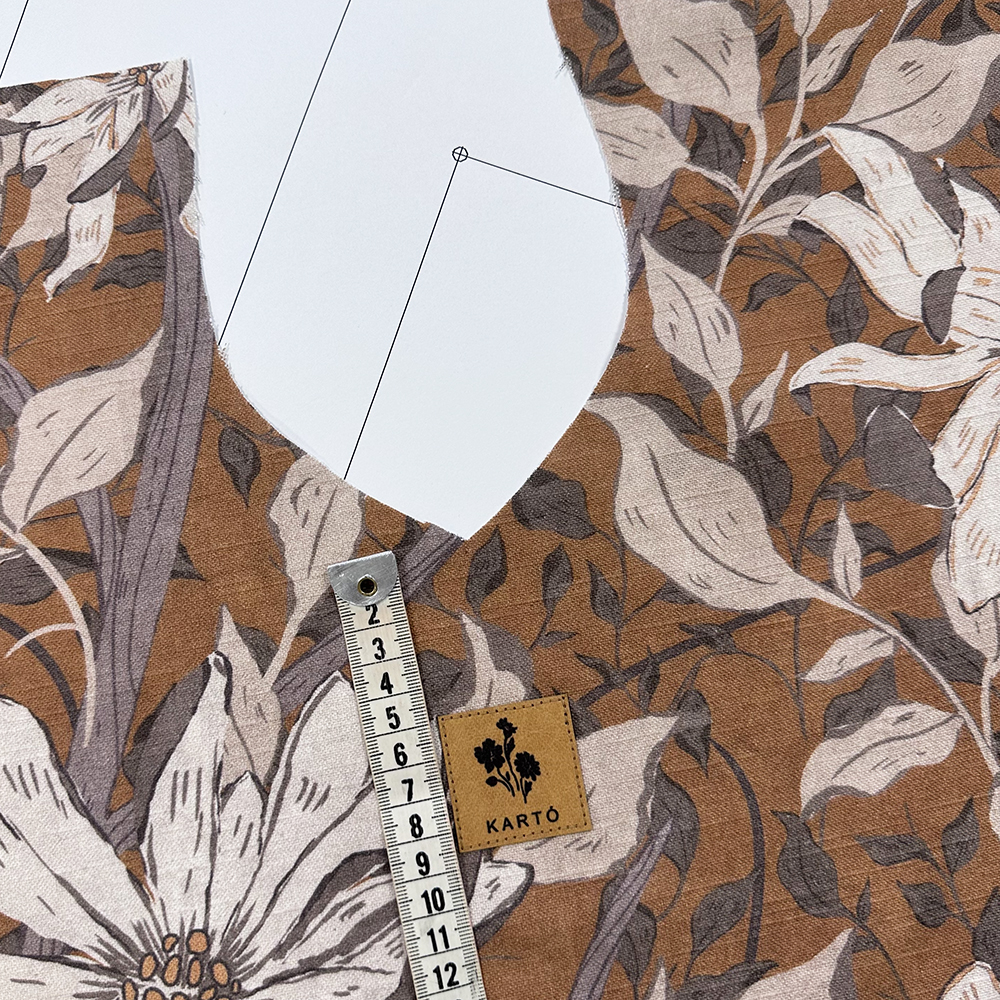
The grainline is important.
The arrow on the pattern piece must always run parallel to the selvage to ensure correct placement on the fabric.
Marking for inner pocket
Notches
Remember to cut the small notches at the markings on the pattern pieces.
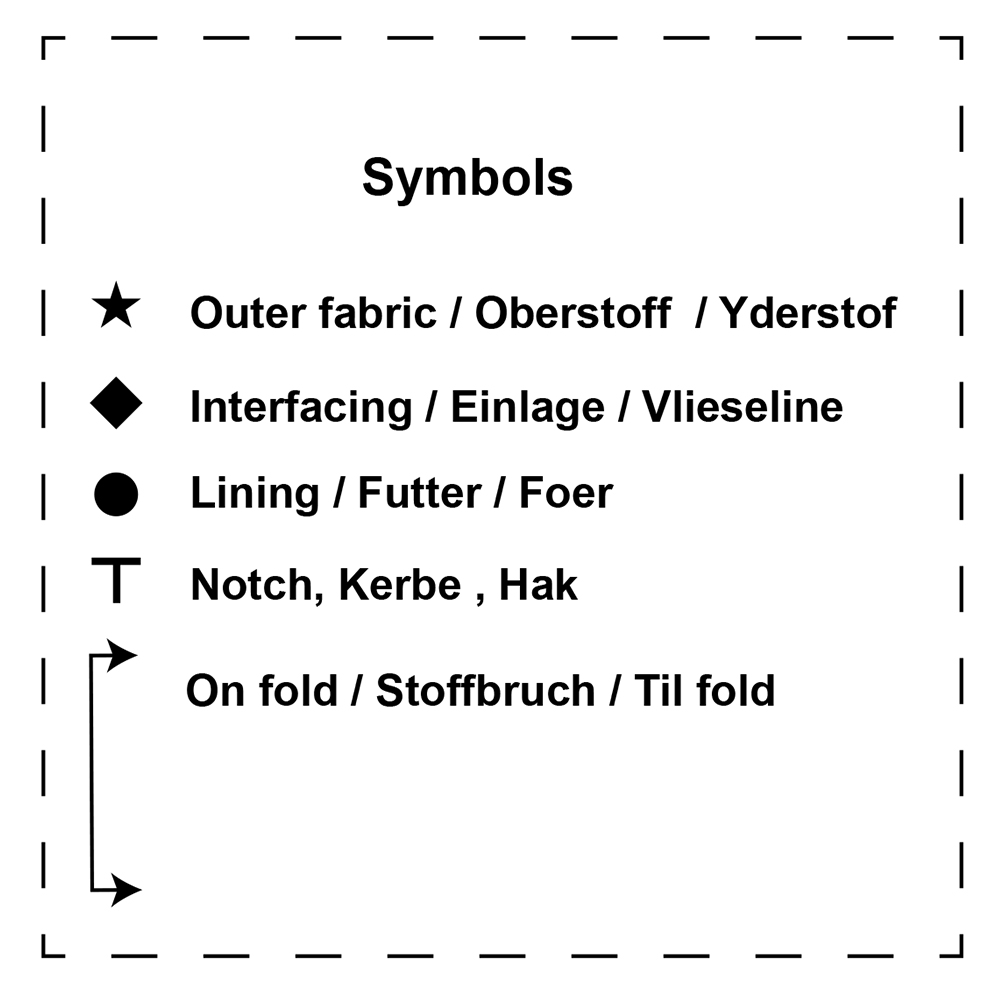
Symbols in the Pattern
This pattern uses different symbols to clearly indicate which pieces should be cut from fabric, lining, and interfacing.
There is also a symbol that marks pattern pieces to be placed on the fold of the fabric, as well as notches that help align the pieces correctly.
Follow these symbols carefully for the best results.
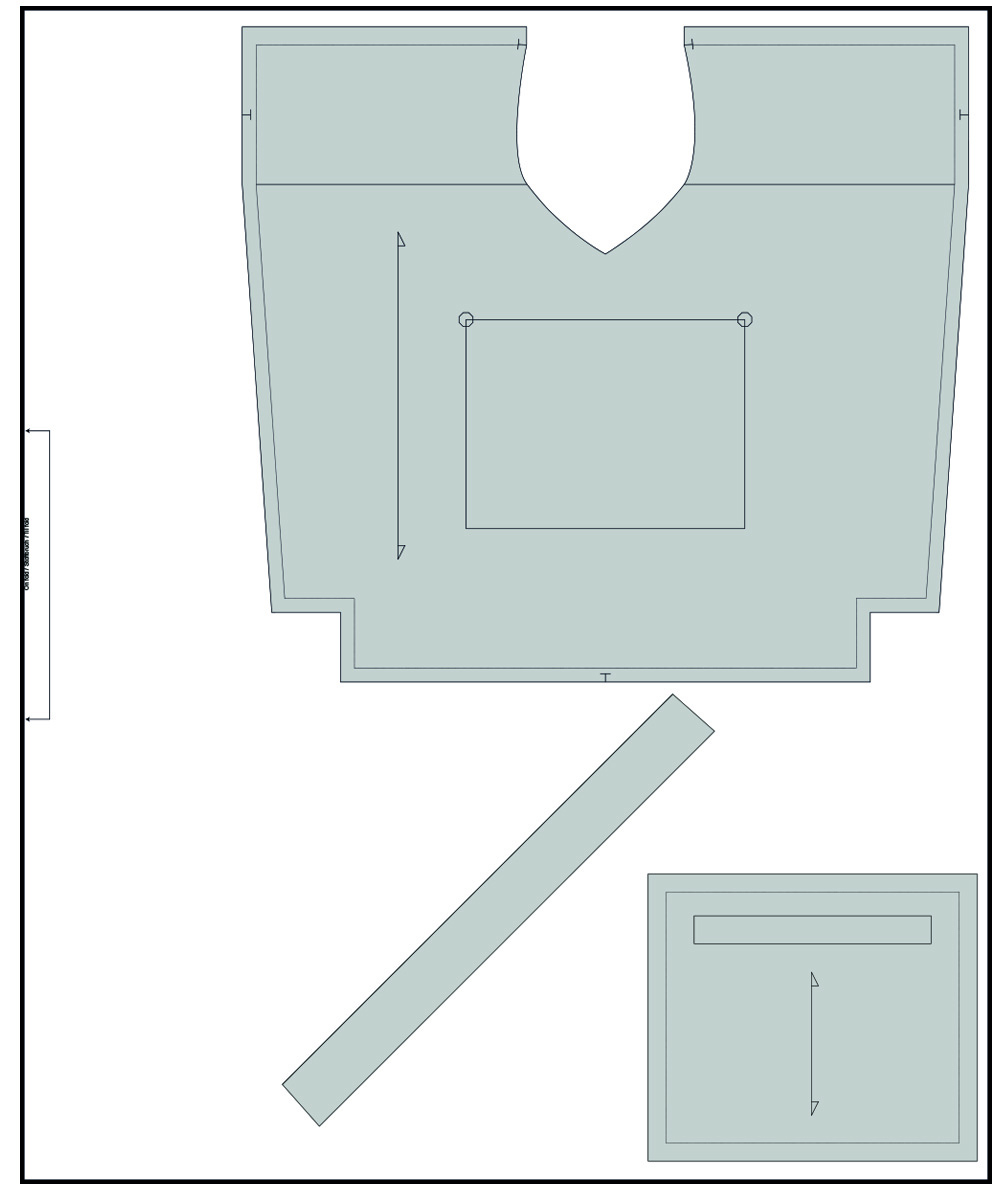
3. Cutting layout – Laura handbag
Cutting layout for outer fabric
Front and back pieces x2
Inner pocket x1
Bias tape x2
Remember to mark the small notches on the front and back pieces.
Cutting layout for lining
Front and back pieces
Pocket bag
Remember to mark the small notches on the front and back pieces, as well as the placement for the pocket bag.
Also mark the 4 notches on the pocket bag.

Cutting layout – Laura shoulder bag
Cutting layout for outer fabric
Front and back pieces
Inner pocket and bias tape.
Cutting layout for lining
Front and back pieces
Pocket bag.
4. Sew the label onto the front piece.
Place the label on the front piece, 5 cm from the top edge, as shown in the picture.
Sew close to the edge of the label.
5. Sew the side seams and bottom in the outer fabric.
6. Sew the corners.
7. Sew the inner pocket.
8. Sewing the lining.
9. Bias tape.
10. Shoulder strap / handles in webbing
4 cm wide webbing.
For the handbag, use 110 cm of webbing.
For the shoulder bag, use 131 cm of webbing.
If you prefer a slightly longer shoulder strap, use 150 cm.