
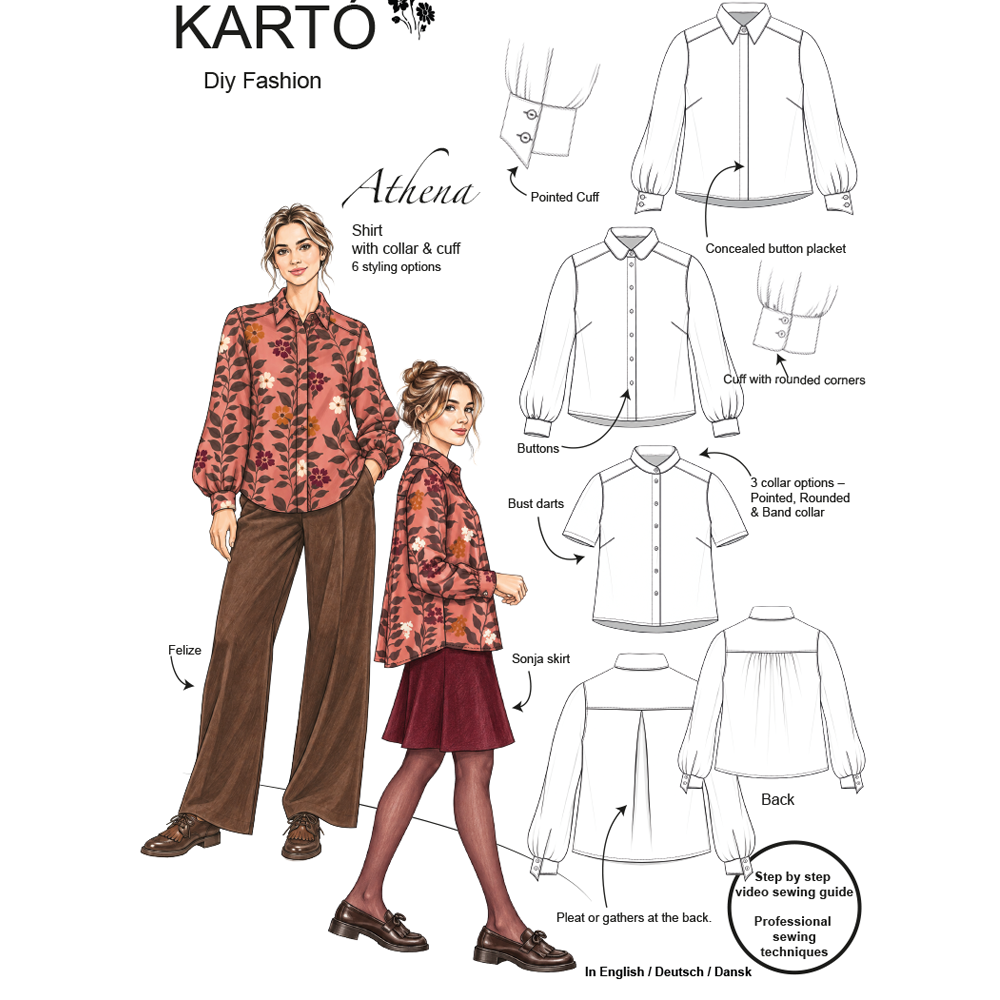
Access to Your Video Sewing Tutorial
You need a password to access your video sewing tutorial.
Your password is printed on the pattern and is unique to you.
If you have any questions, you are always welcome to contact us at sewing@karto.dk
2. Your pattern includes a 1 cm seam allowance.
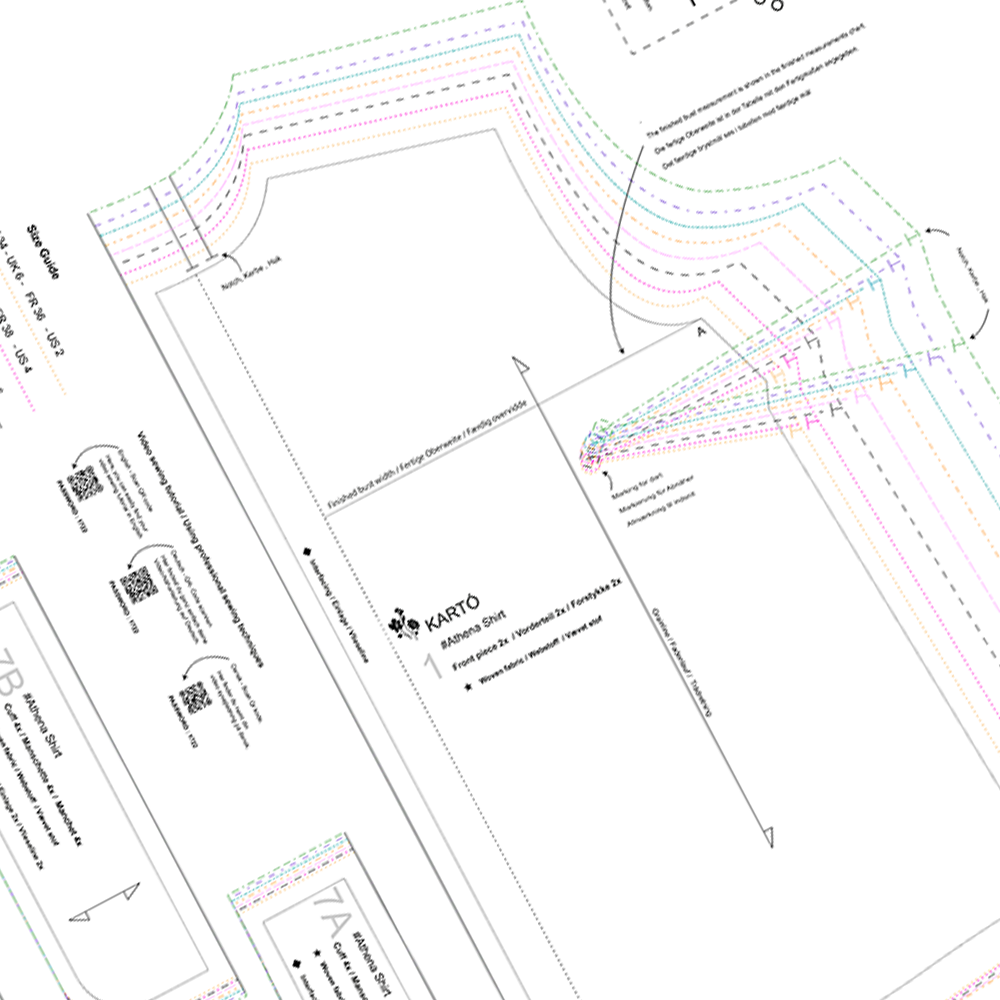
Seam allowance.
Your pattern includes 1 cm seam allowance and 2 cm for the hem.
Grainline.
The grainline is important. The arrow on the pattern piece must always be parallel to the selvage to ensure correct placement on the fabric.
Notches.
Remember to cut the small notches according to the markings on the pattern pieces.
Stitch length.
Sew the shirt together with a stitch length of 2.5 (9 stitches per 2 cm).
For topstitching, use a stitch length of 3.
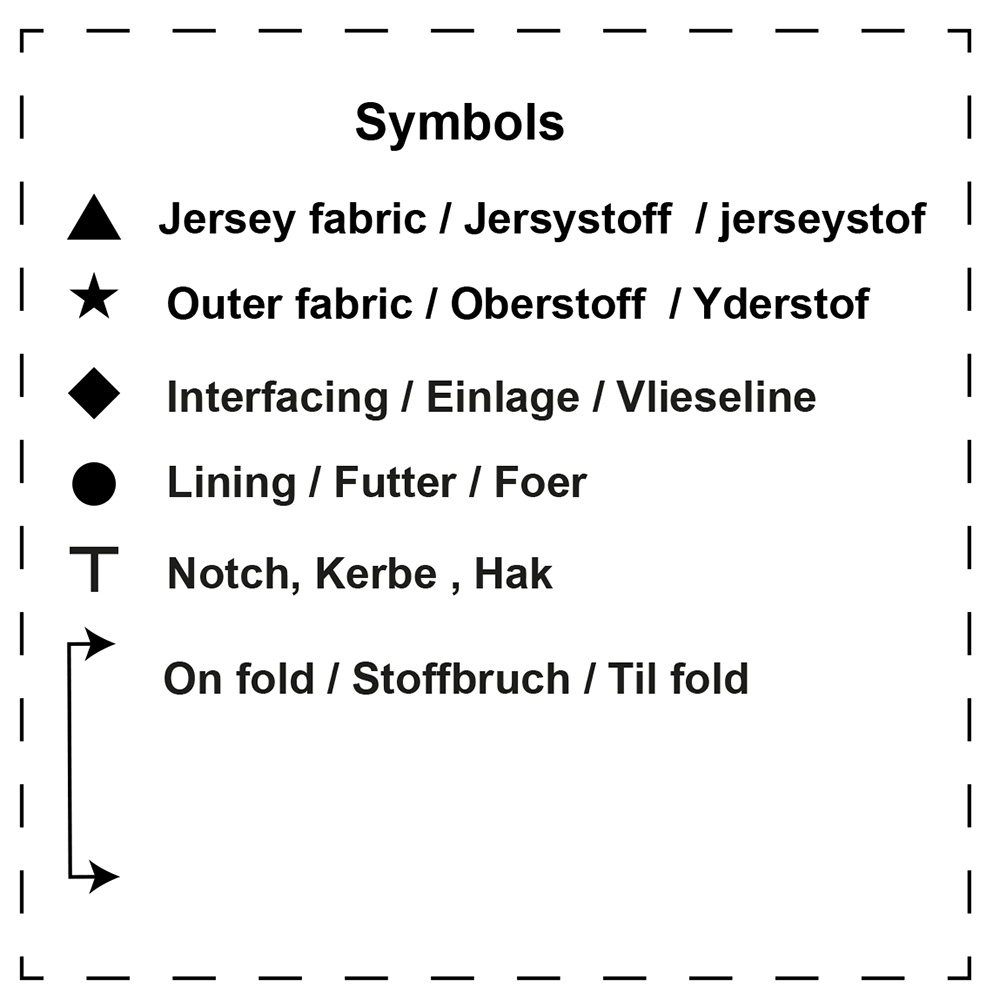
Explanation of symbols in the pattern
In this pattern, different symbols are used to clearly indicate which pieces should be cut in fabric, lining, and interfacing.
There is also a symbol showing which pattern pieces should be placed on the fold of the fabric, as well as notches that help you align the pieces correctly.
Follow the symbols carefully for the best result.
3. Cutting layout
-
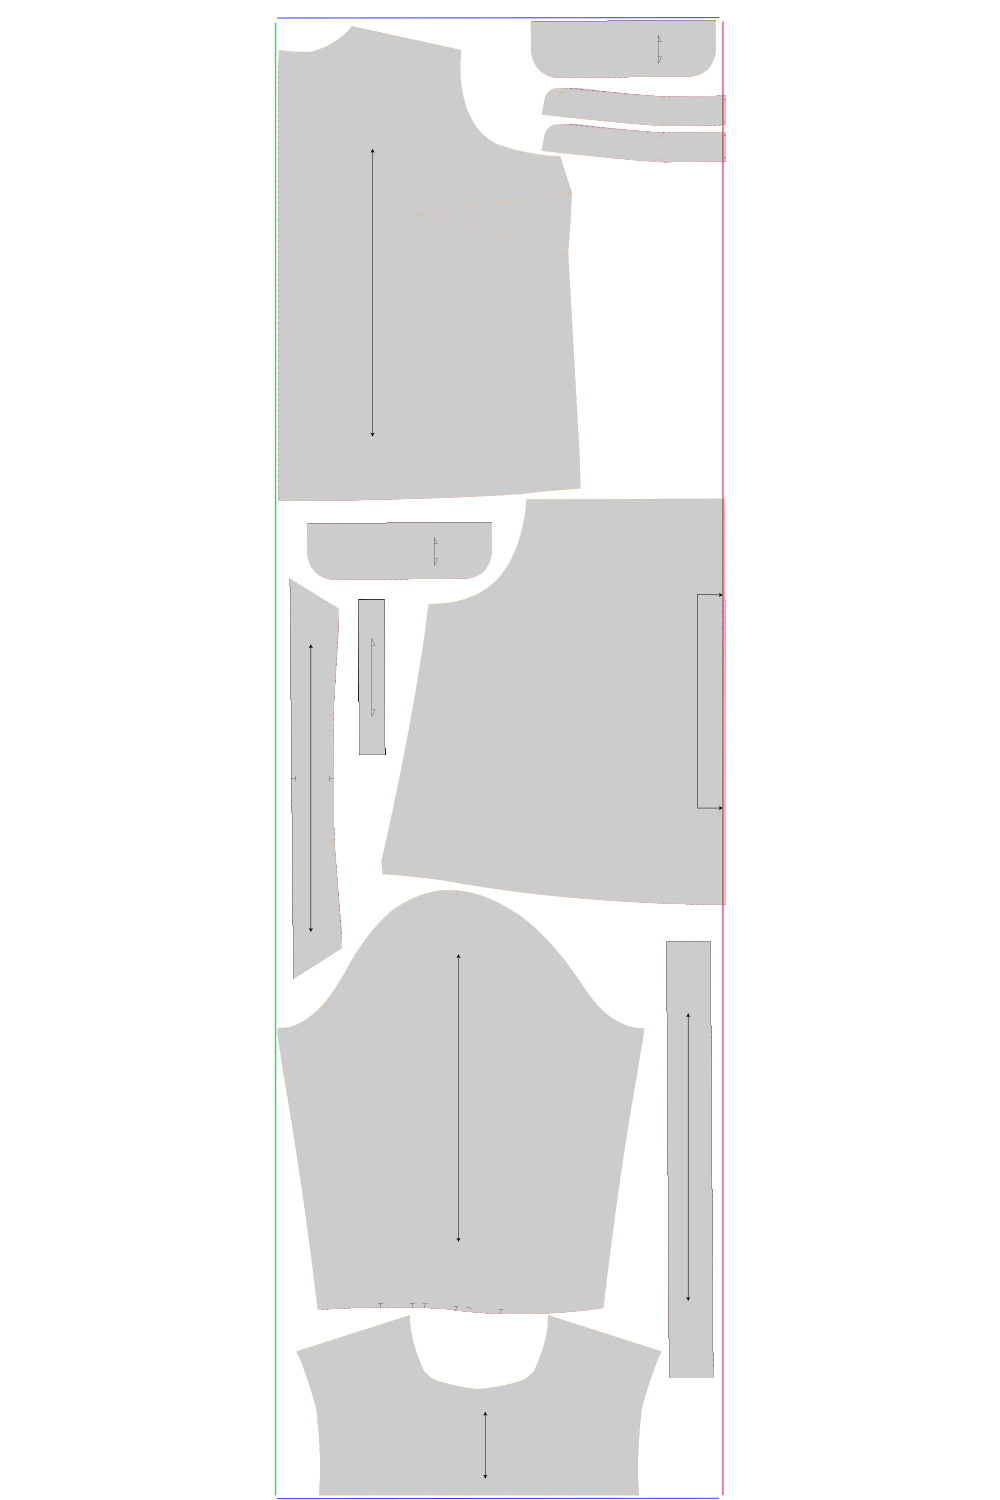
1. Front piece 2x
-
2. Back piece 1x on fold
-
3. Yoke 2x
-
4. Buttonhole placket 1x
-
5. Sleeve 2x
-
6A + 6B Collar 2x + 1x fusible interfacing, 2x for lightweight fabrics
-
6C Collar stand 2x + 1x fusible interfacing, 2x for lightweight fabrics
-
7. Cuff 4x + 2x fusible interfacing, 4x for lightweight fabrics
-
8. Sleeve slit binding 2x
Size EU 34 - 48
Red line = Fold line
Green line = selvegde
Blue line = egde
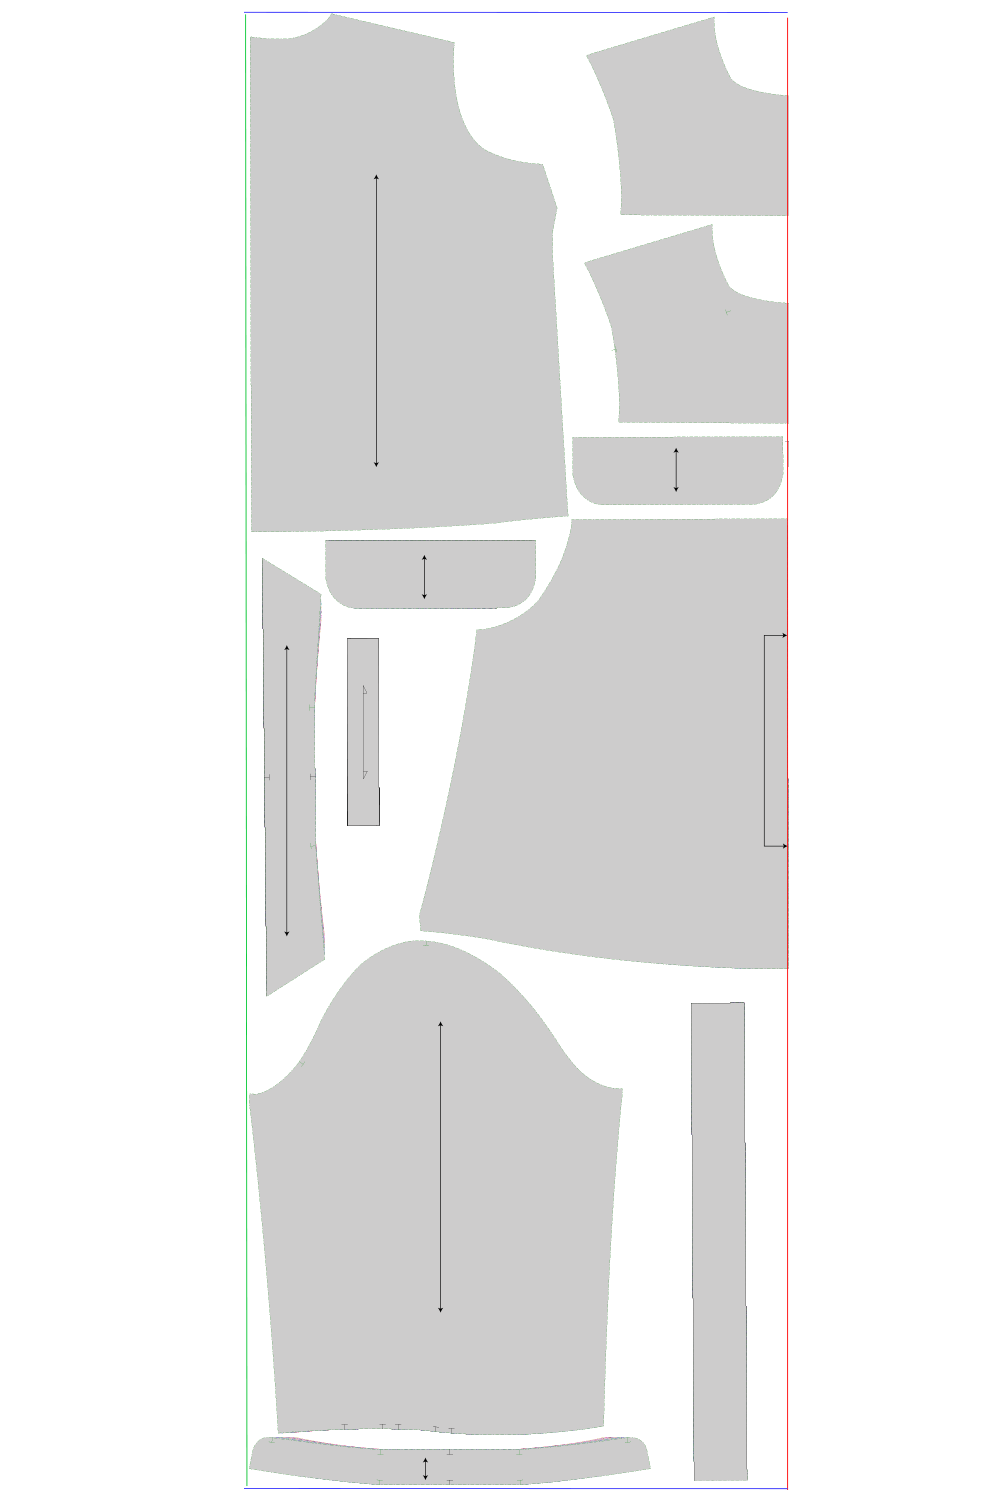
Size EU 48 - 56
Red line = Fold line
Green line = selvegde
Blue line = egde
That’s why we sew topstitching…
Topstitching has both a practical and a visual function.
It keeps the seam allowance in place and gives a neat, professional finish.
At the same time, it helps shape the design expression – you can choose thread colour and placement depending on the look you want. Sew close to the edge for a discreet finish or with a little distance for a more striking effect.
4. Sew the bust dart
5. Sew the shoulder seams
6. The back can be sewn with an inverted pleat or gathers.
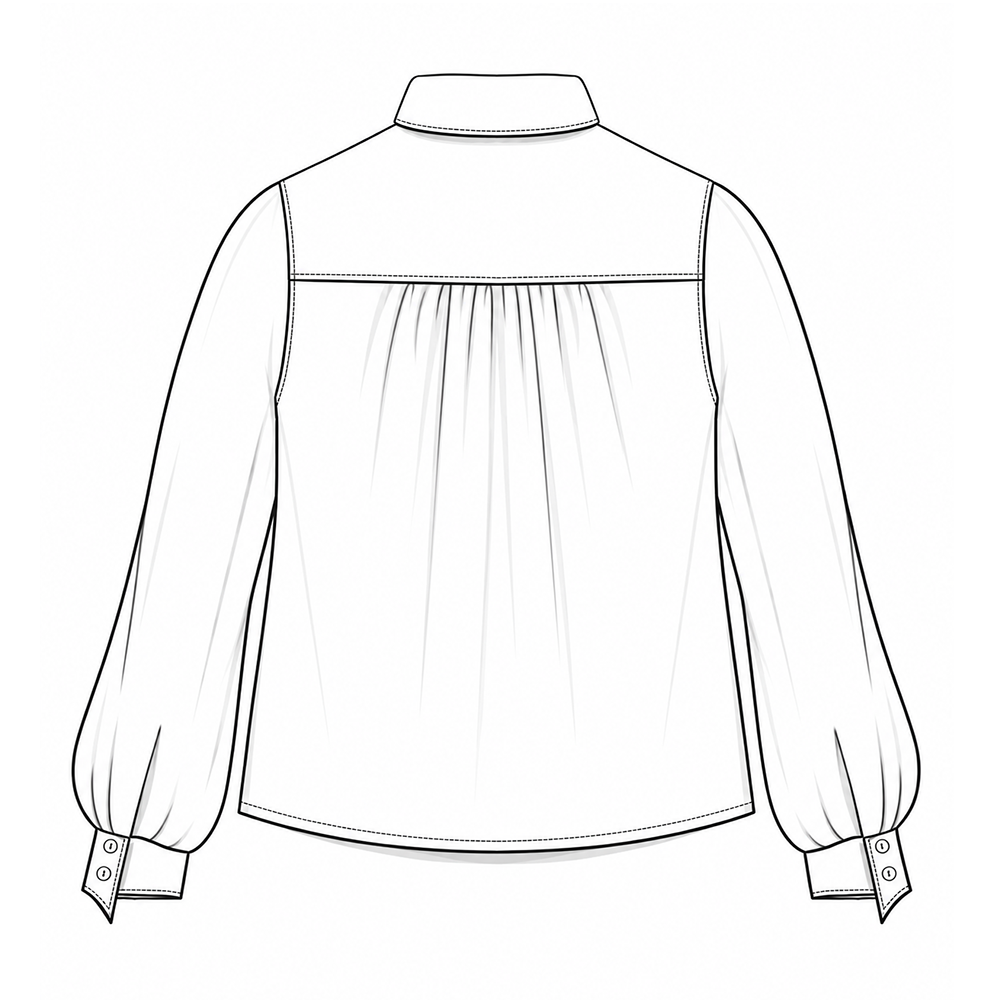
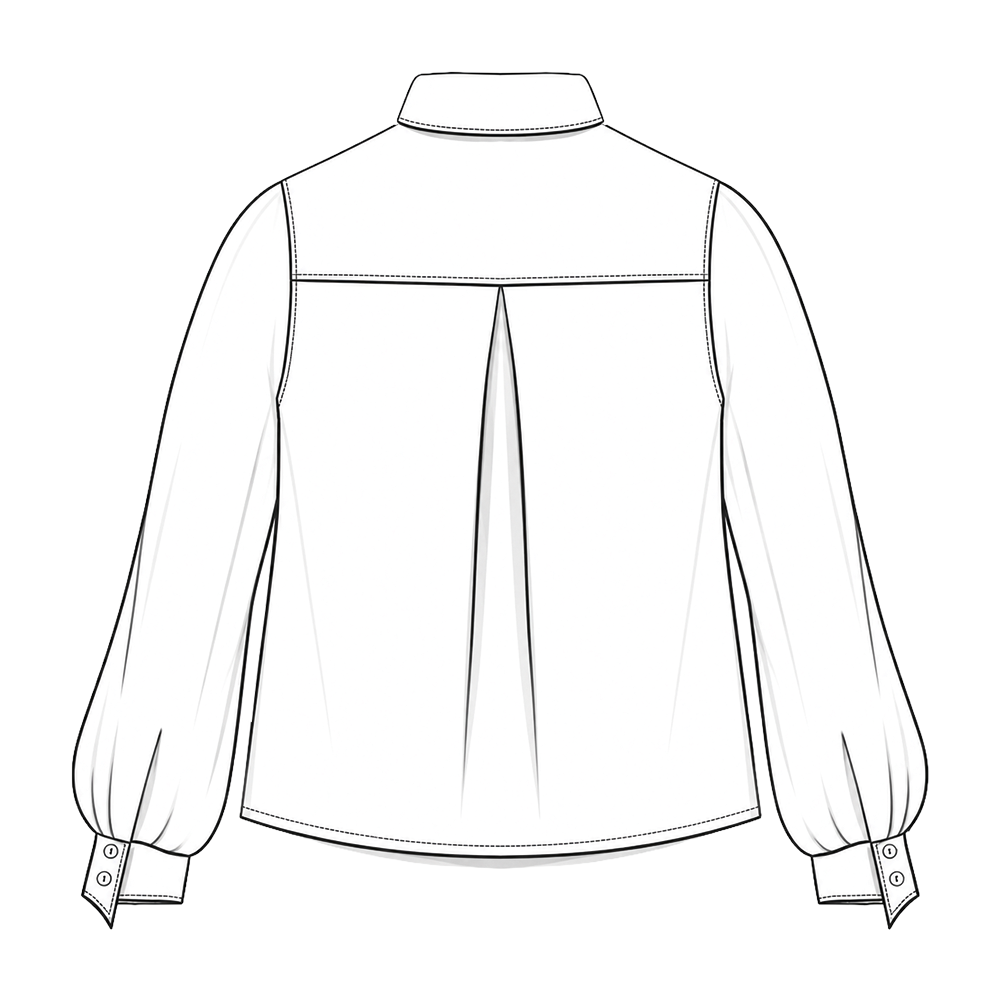
7. Sew the back piece to the yoke.
Choose gathers or pleats at the lower edge of the sleeve, where the cuff is attached.
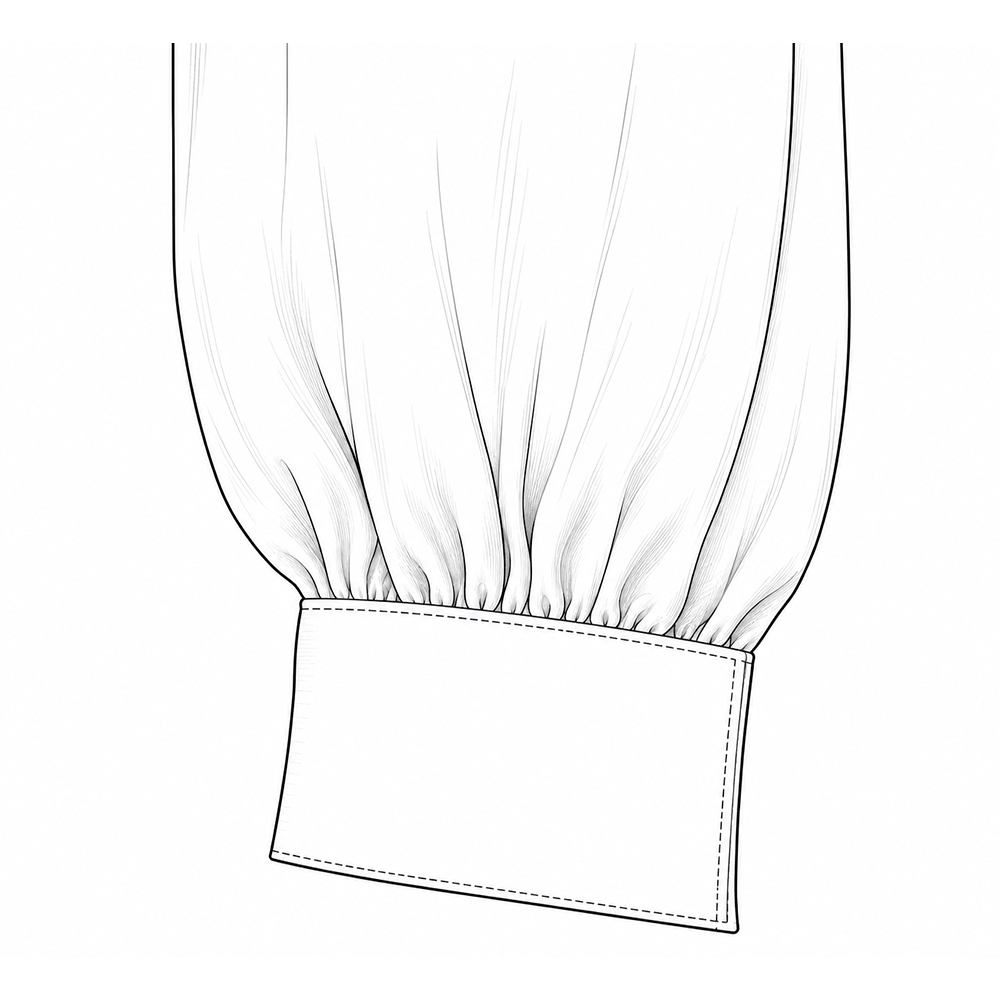
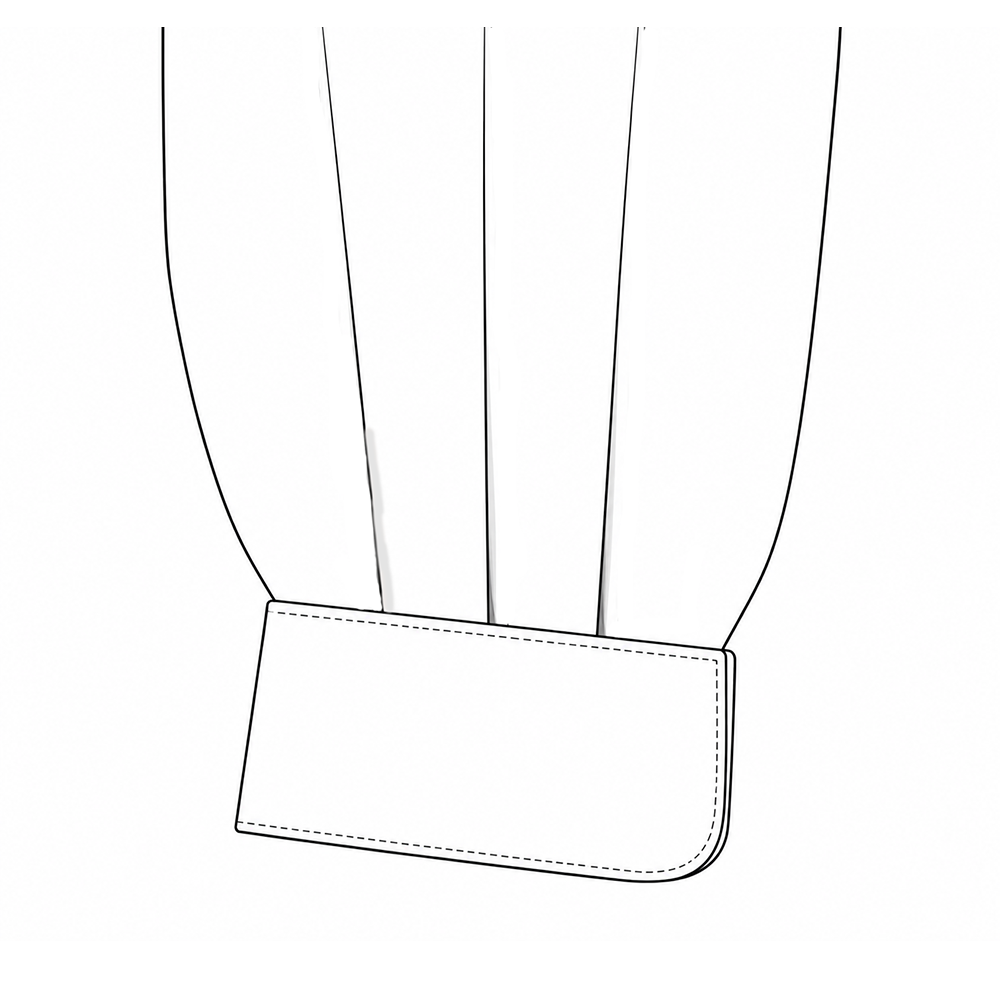
8. Sew the sleeve slit.
9. Attaching the sleeves.
10. Sew the side and sleeve seams and bust darts.
11A. Sew the front placket with visible buttons and buttonholes.
11B. Sew the front placket with concealed button closure.
Sewing technique for sharp collar and front edge corners
This video is not part of the actual sewing sequence, but shows the techniques you will need later in the sewing process.
12. Sew the collar with pointed collar tips. For Athena, there is no separate pattern piece no. 7 for fusible interfacing.
Sewing techniques for rounded corners on collars and cuffs. This video is not part of the sewing sequence but demonstrates the techniques you will need later in the sewing process.
13. Sew the collar with rounded collar tips.
14. Sew the collar stand with collar.
15. Sew the band collar.
16. Attach the collar stand with collar or the band collar to the shirt.
17. Sew the cuffs with rounded or pointed corners.
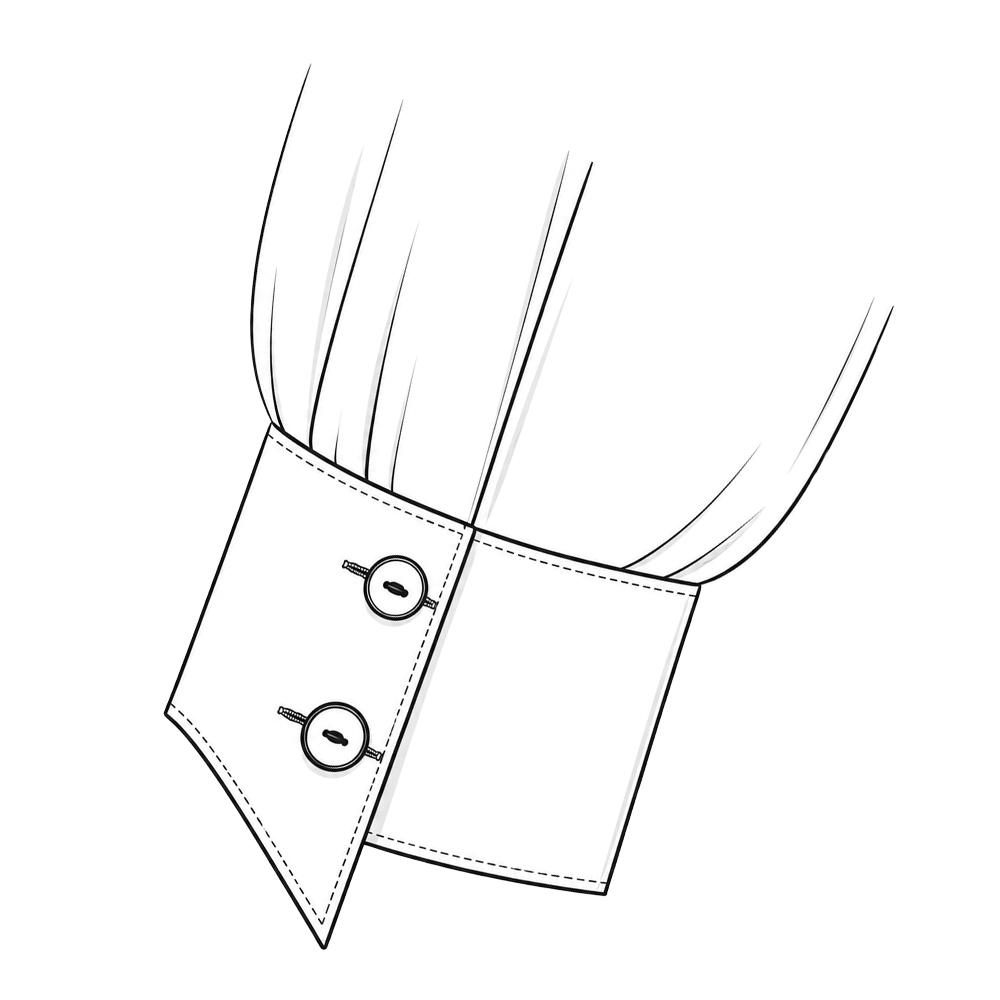
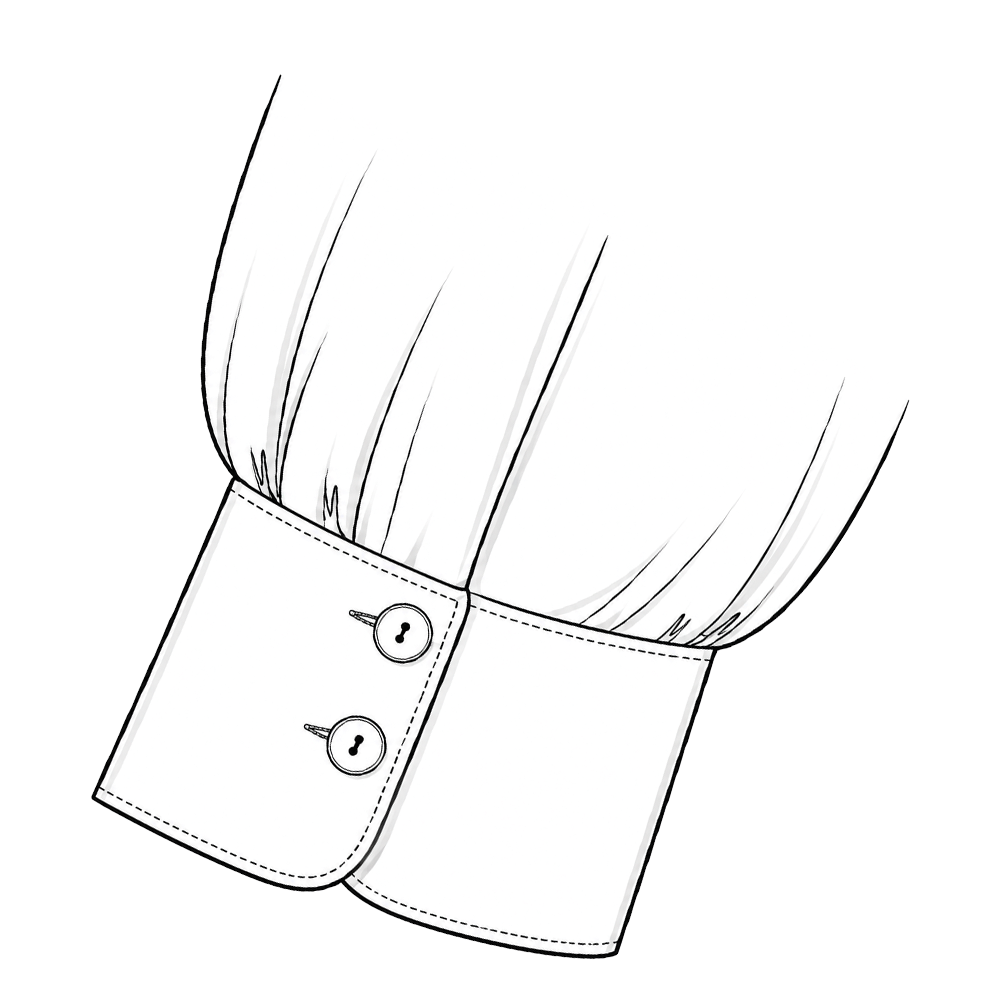
17. Sew the cuffs with rounded or pointed corners.
18. Sew the cuffs onto the sleeves.
19. Hemming the shirt. The same technique can be used to hem the short sleeves.
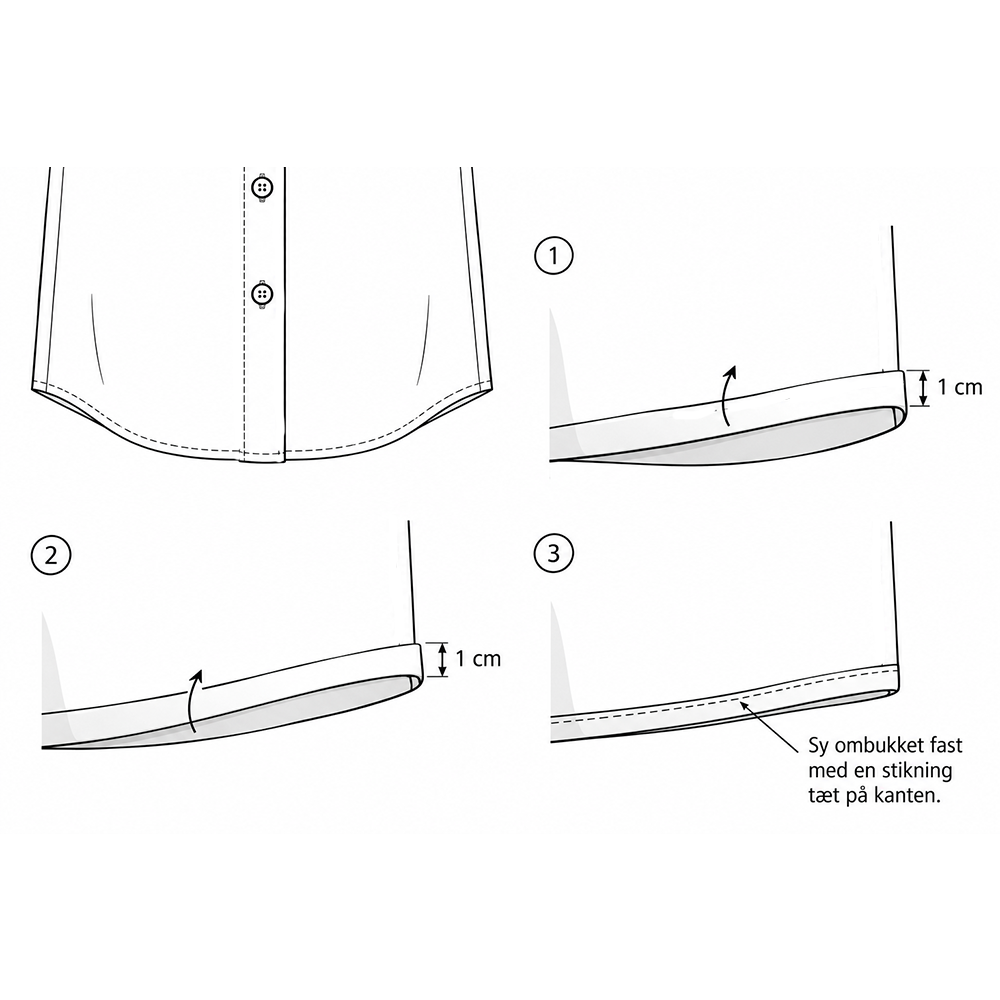
Hemming the bottom edge of the shirt
First, overlock the bottom edge of the shirt. Then fold the edge 1 centimeter to the wrong side and press. Fold it over another 1 centimeter and press again. Secure the hem by stitching close to the upper folded edge all the way around.
20. Sew the buttonholes and attach the buttons to the shirt.
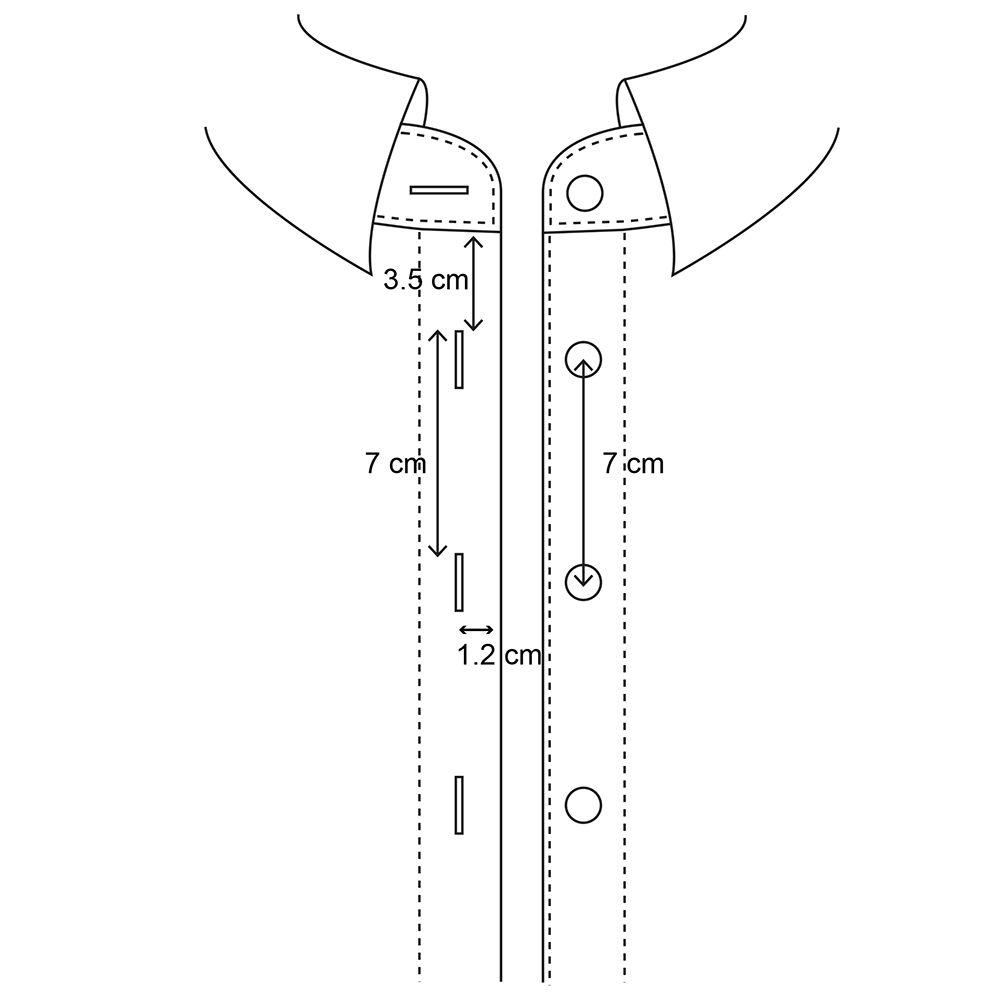
Buttonhole placement and sewing
Buttonholes along the front edge:
Sew the buttonholes on the right front piece (the right side when wearing the shirt).
Sew the first vertical buttonhole 3.5 cm below the lower edge of the collar stand. Position the following buttonholes 7 cm apart, measured from the beginning of one buttonhole to the beginning of the next.
All buttonholes along the front edge are sewn vertically, with a distance of 1.2 cm from the front edge to the center of the buttonhole.
For a button with a diameter of 1.2 cm, sew a buttonhole measuring 1.5 cm.
Buttonhole in the collar stand:
Sew the buttonhole horizontally in the center of the collar stand, with a distance of 1 cm from the front edge to the beginning of the buttonhole.
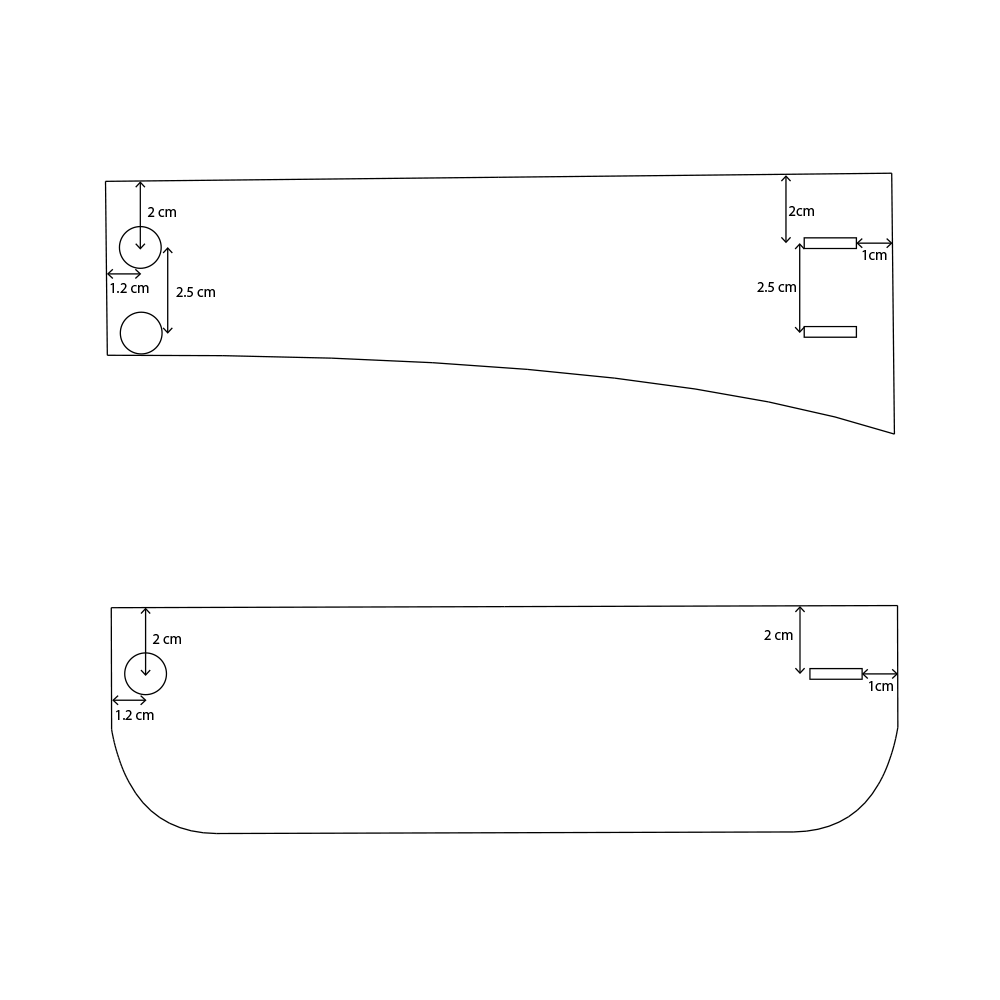
Placement of button and buttonhole on the cuff
Sew the button and buttonhole according to the measurements shown in the illustration. The illustration shows the placement on the left cuff. On the right cuff, the button and buttonhole are positioned as a mirror image.